
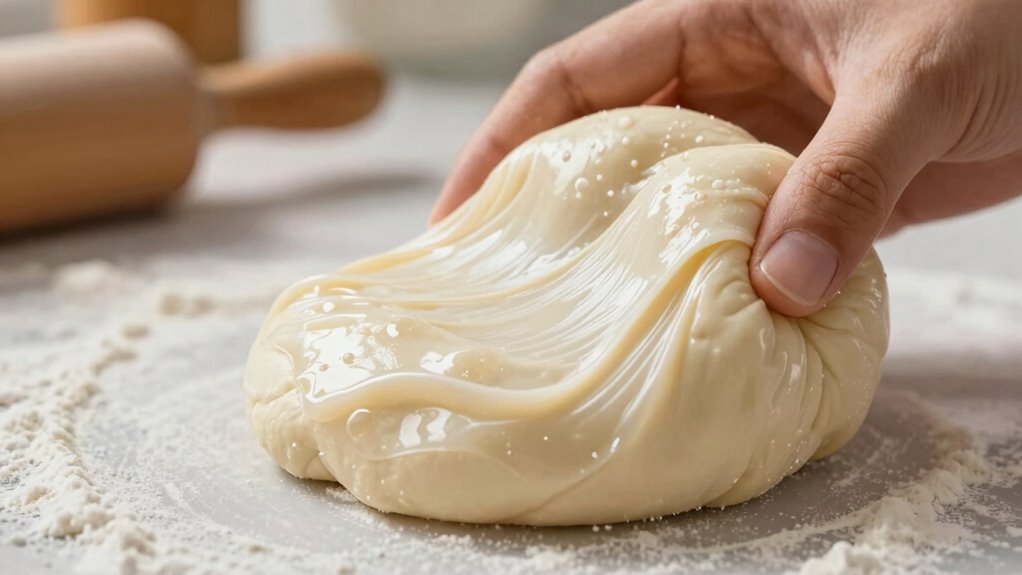
To know when your dough has developed enough gluten, feel for a smooth, elastic texture that quickly bounces back when pressed. It should be slightly tacky but not sticky, and able to stretch into a thin, translucent “windowpane” without tearing. Avoid overworking it, which can make your bread dense or tough. If you’re unsure, learn the key cues and techniques to perfect the process—details that will help you bake consistently excellent bread.
Key Takeaways
- The dough becomes smooth, cohesive, slightly tacky, and elastic, resisting tearing when gently stretched.
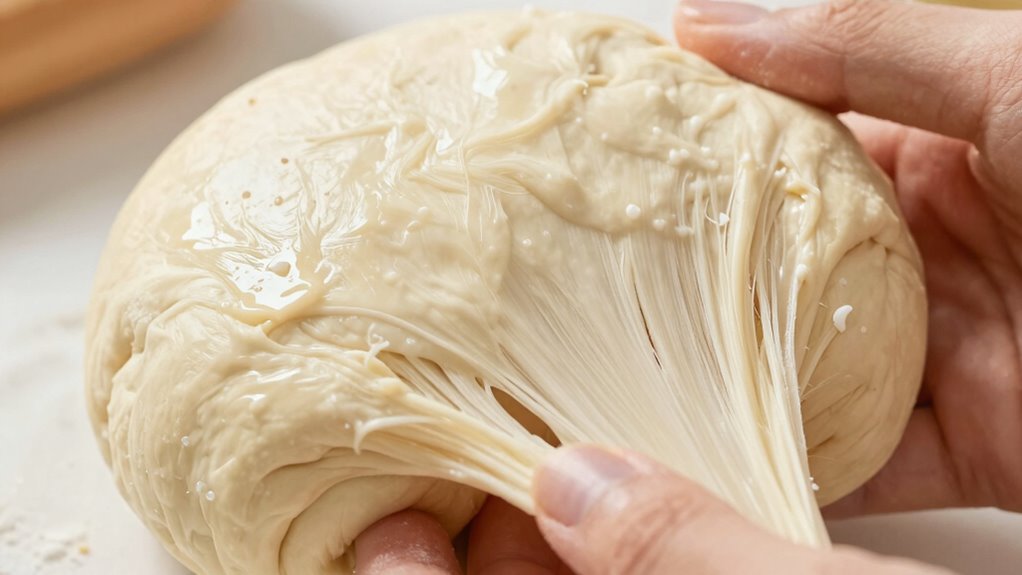
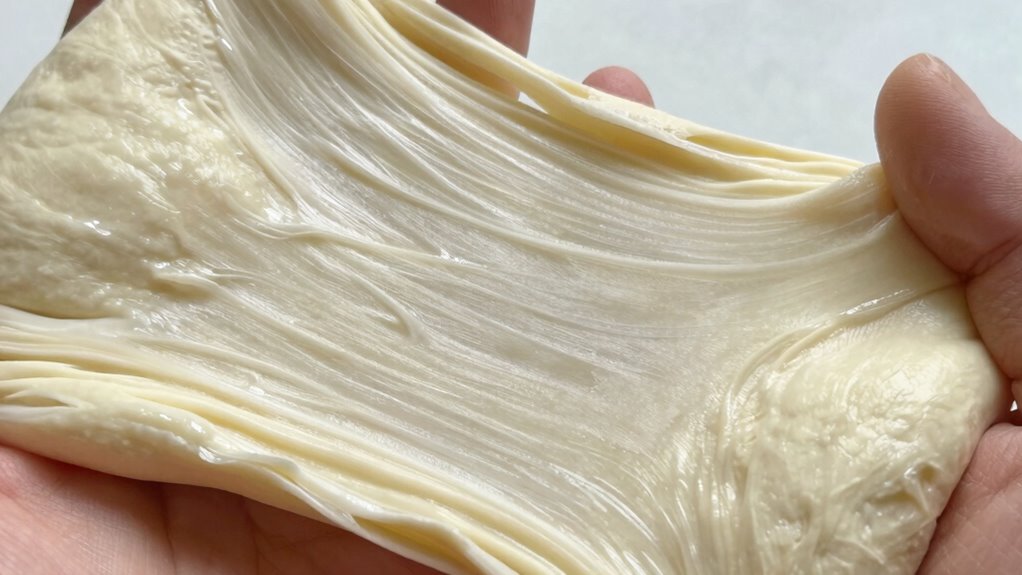
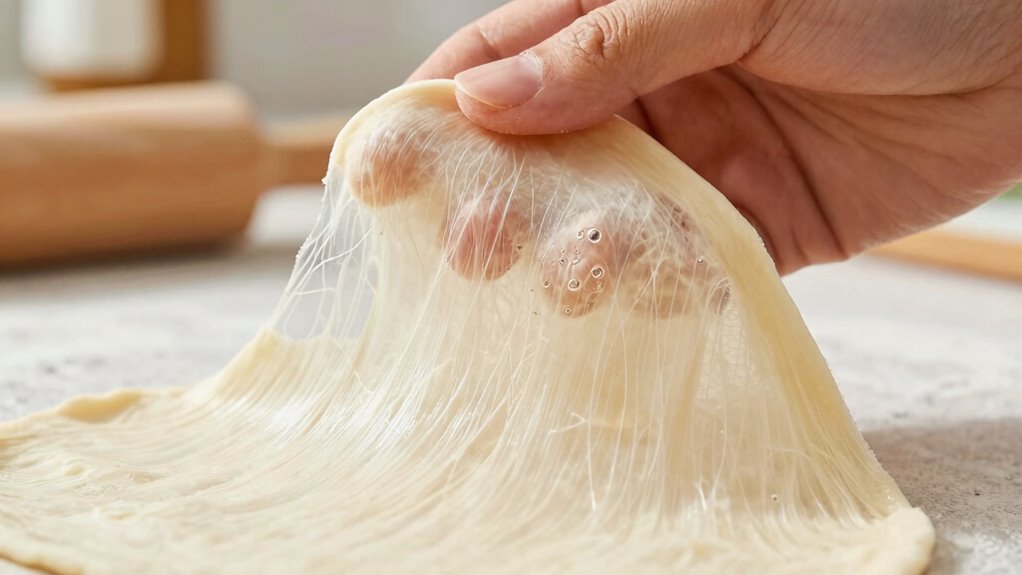
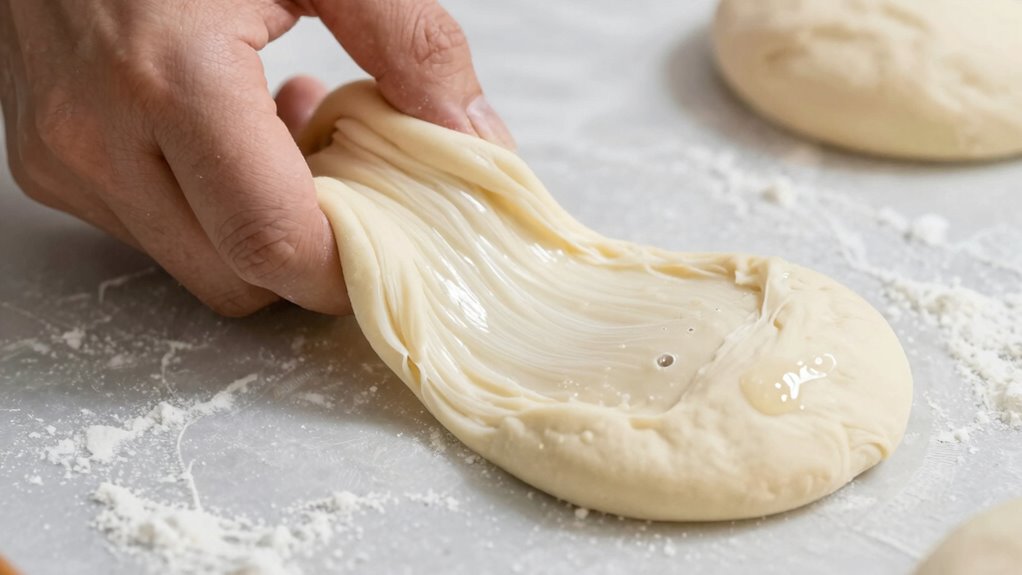
- Perform the windowpane test: stretch a small piece into a thin, translucent membrane without tearing.
- The dough springs back when pressed and quickly returns to shape, indicating good elasticity.
- Properly developed gluten feels firm, pliable, and slightly sticky but not overly stiff or sticky.
- Over-kneading or under-kneading results in poor gluten development, shown by tearing or lack of elasticity.

Body Fortress Super Advanced Whey Protein Powder, Gluten Free, Vanilla, Immune Support (1), Vitamins C & D Plus Zinc, 1.74 lbs
IMMUNE SUPPORT FORMULA – Boost your daily wellness with added Vitamins C and D and Zinc, key nutrients...
As an affiliate, we earn on qualifying purchases.
Why Is Gluten Development Important for Perfect Bread?

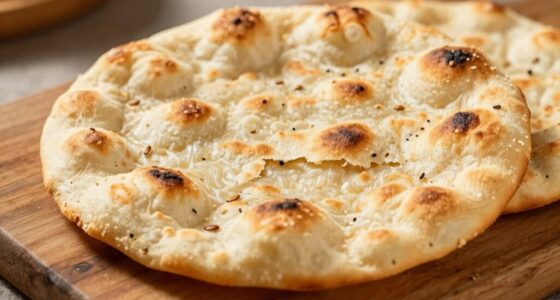
Have you ever wondered why some bread turns out perfectly chewy and airy while others fall flat? The answer lies in the gluten structure you cultivate during kneading. When you work the dough properly, you create a strong network of gluten proteins that trap gas bubbles, giving your bread its rise and texture. This gluten network also boosts dough elasticity, allowing it to stretch without tearing. Without enough gluten development, the bread lacks the necessary structure, resulting in a dense, crumbly loaf. Conversely, overworking the dough can make it too tough. Striking the right balance ensures your bread is both tender and well-structured. Proper gluten development is essential to achieving that ideal chewy, airy crumb you’re aiming for. Monitoring gluten formation helps you determine the perfect point of readiness during kneading, especially as the dough’s elasticity and extensibility change. Recognizing the gluten development stages can help bakers refine their technique and achieve consistent results. Additionally, understanding the role of hydration in gluten formation can further improve your bread’s texture and volume. Consistent kneading techniques also contribute to uniform gluten development, leading to better baking outcomes.

Dymatize ISO100 Whey Protein Powder Isolate, Gourmet Vanilla, 25g of Protein, 5.5g BCAAs, Less Than 120 Cal., Gluten Free, 1g Fat, 1g Sugar, 2g Carb (20 Servings)
OUR BEST-QUALITY PROTEIN: Dymatize ISO100 is our higest-quality protein, and it is designed to support muscle growth through...
As an affiliate, we earn on qualifying purchases.
How to Recognize When Gluten Is Fully Developed (Visual & Feel Cues)
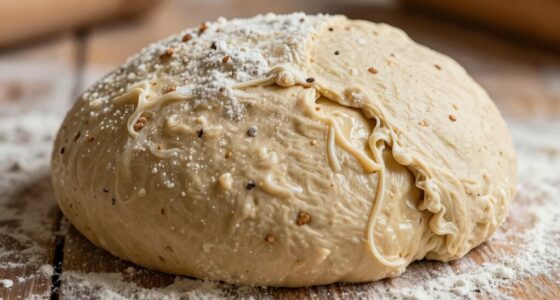
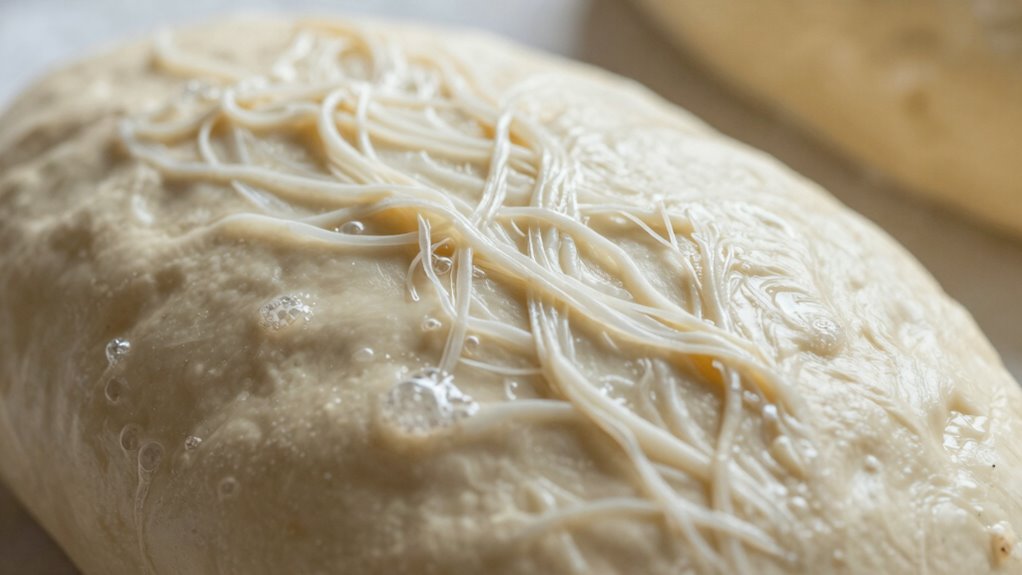
Once you’ve kneaded your dough to develop gluten, it’s important to know when the network is fully formed. You’ll notice gluten growth as the dough becomes smoother and more cohesive. It should feel elastic and slightly tacky, without being sticky. As you gently stretch the dough, it will resist tearing and stretch into a thin, translucent membrane known as the “windowpane test.” This indicates that gluten has developed enough to give the dough structure. The dough’s elasticity will improve, bouncing back when pressed lightly. Recognizing these signs ensures your dough is ready for the next steps, leading to a better rise and a more satisfying final bread. Proper dough handling also helps maintain the integrity of the gluten network during shaping and baking. Additionally, understanding gluten development can help bakers troubleshoot issues with dough texture and rise. Paying attention to visual cues like surface appearance can further confirm readiness. Monitoring hydration levels can also influence how well the gluten develops during kneading. Being aware of how fermentation time affects gluten formation can further improve your baking results.

Optimum Nutrition Gold Standard 100% Whey Protein Powder, Double Rich Chocolate 1.98 Pound (Packaging May Vary)
24 g High-Quality Whey Protein per Scoop – 100% of the protein from whey for a fast-absorbing, complete...
As an affiliate, we earn on qualifying purchases.
How Does Dough Feel When Gluten Is Ready? The Feel Test Explained
When gluten is properly developed, your dough will feel noticeably elastic and springy under gentle pressure. This is a sign of good dough elasticity, indicating that the gluten strands have formed enough to give the dough its stretch and bounce. As you press and then release, the dough should quickly return to its original shape without tearing or feeling overly stiff. The sensation of gluten elasticity is key to knowing if your dough is ready for the next step. It shouldn’t feel gummed or overly sticky, but instead firm yet pliable. Developing a gluten network through proper kneading enhances the dough’s ability to trap gas during fermentation, resulting in a light, airy crumb in the finished bread. Proper gluten development not only affects texture but also the overall structure of your bread, ensuring it rises well and maintains its shape. This feel test helps you gauge whether the gluten network has developed enough to trap gas during fermentation, resulting in a light, airy crumb in the finished bread. Proper gluten development ensures your bread will have the ideal texture and structure. Additionally, understanding the feel test can help you achieve consistent results with different types of dough.

Premier Protein Powder, Vanilla Milkshake, 30g Protein, 1g Sugar, 100% Whey Protein, Keto Friendly, No Soy, Gluten Free, 23.3 oz (17 Servings)
Sweet and smooth, this vanilla flavored protein powder helps pack in the nutrition you rely on every day...
As an affiliate, we earn on qualifying purchases.
When to Stop Kneading: Timing Your Effort for Best Gluten Formation

Timing your kneading correctly is essential to achieving well-developed gluten without overworking the dough. Knowing when to stop ensures ideal dough elasticity and strong gluten strands. As you knead, pay attention to these signs:
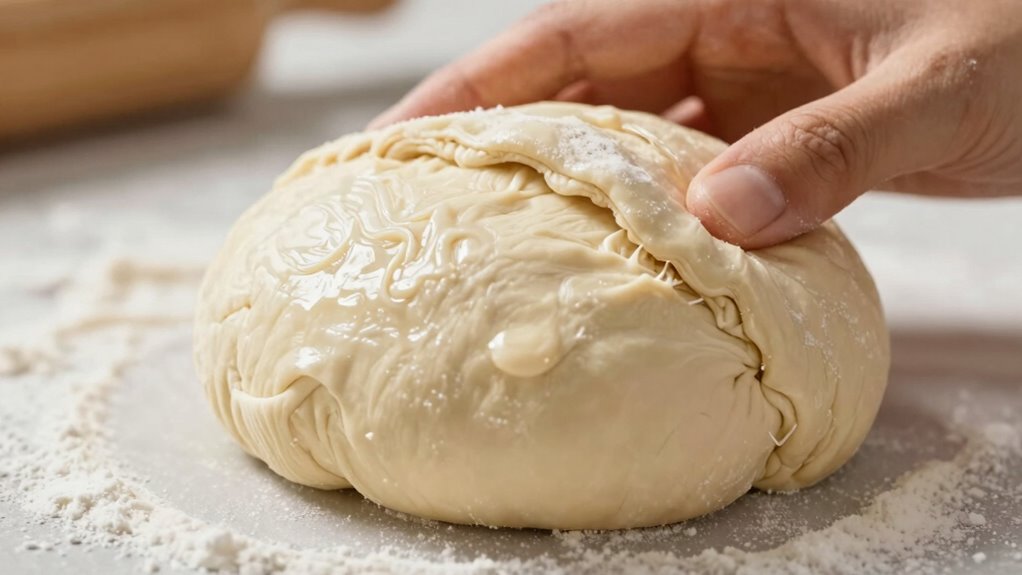
- The dough becomes smooth and slightly tacky, indicating proper gluten development.
- It springs back slightly when pressed, showing good elasticity.
- The dough feels firm yet supple, without feeling sticky or overly stiff.
Stop kneading once these signs appear, as overworking can break down gluten strands and make the dough tough. Proper timing helps create a balanced gluten network, resulting in a better rise and texture. Remember, patience during this stage leads to a more elastic dough ready for shaping and baking.
How to Perform the Windowpane Test to Check Gluten Development
To perform the windowpane test correctly, you need to prepare your dough properly by kneading it until it’s smooth and elastic. Once ready, gently stretch a small piece of dough into a thin, translucent membrane without tearing it. By interpreting the gluten texture, you can determine if your dough has developed enough gluten for ideal baking results. Ensuring proper high-quality ingredients can also enhance gluten development and overall dough texture.
Preparing the Dough Properly
Ensuring your dough has enough gluten develops a strong, elastic structure essential for good bread. Proper preparation involves paying attention to dough hydration and flour types. To get it right:
- Adjust dough hydration based on your flour; higher hydration helps develop gluten more easily.
- Use high-protein flours, like bread flour, for better gluten formation.
- Knead thoroughly, but don’t overdo it—seek a smooth, elastic dough that passes the windowpane test.
These steps guarantee your dough is ready for gluten development. Properly prepared dough will be easier to stretch and form, giving your bread a desirable crumb and texture. Remember, the right balance of dough hydration and choosing the appropriate flour types are key to achieving ideal gluten development.
Performing the Test Correctly
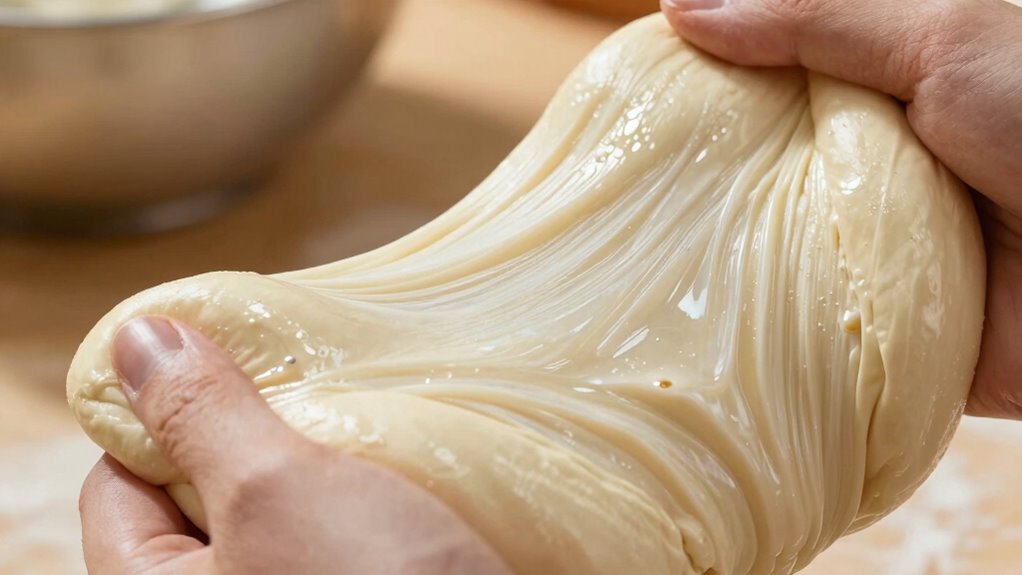
Performing the windowpane test correctly is essential to determine whether your dough has developed enough gluten. To do this, gently stretch a small piece of dough with your fingertips, aiming for a thin, translucent membrane without tearing. This gluten testing reveals the dough’s elasticity and strength, which are key indicators of proper gluten development. Pay attention to the dough texture as you stretch; it should feel smooth, pliable, and slightly tacky, not sticky or overly stiff. If the dough tears easily, it needs more kneading; if it’s too elastic and resists stretching, it may be overworked. Performing this test consistently helps you gauge when your dough is ready for the next step, ensuring *ideal* gluten development for a perfect bake.
Interpreting Gluten Texture
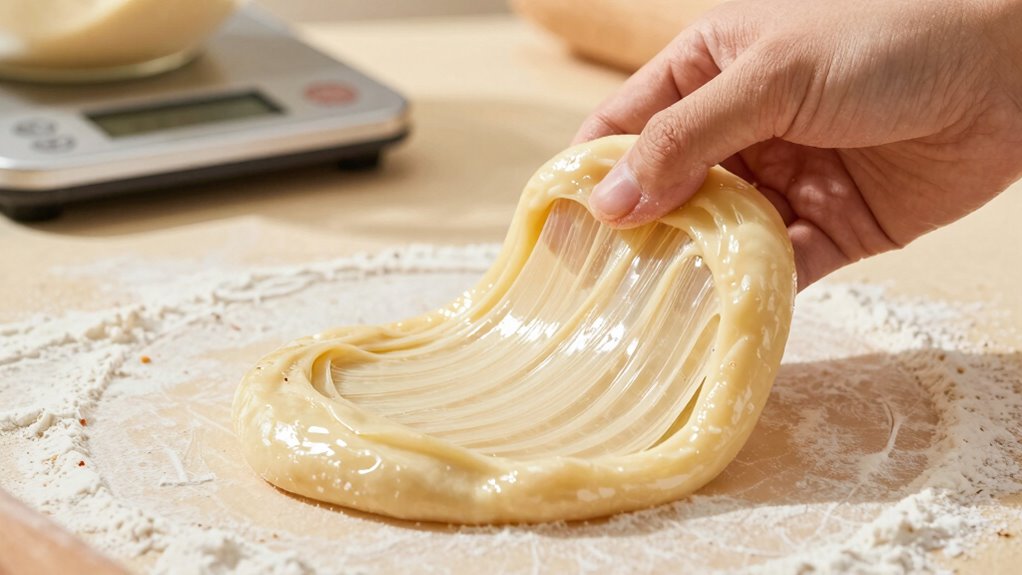
Interpreting the texture of your dough during the windowpane test provides immediate insight into gluten development. When you gently stretch the dough, pay attention to its gluten texture and dough feel. If it stretches thin without tearing and forms a translucent membrane, your gluten is well-developed. Conversely, if it tears easily or feels stiff, it needs more kneading. To assess effectively:
- Look for a thin, even, and slightly translucent membrane without holes.
- Check that the dough stretches without tearing, indicating strong gluten strands.
- Feel for elasticity; a dough that springs back slightly signifies proper gluten development.
Mastering this interpretation helps you determine when your dough is ready for the next step and guarantees optimal gluten structure for baking success.
Common Kneading Mistakes That Prevent Proper Gluten Formation
One common mistake that prevents proper gluten formation is overworking the dough. When you knead excessively, you disrupt the delicate gluten network you’re trying to develop. Using incorrect kneading techniques can also hinder gluten elasticity, making the dough tough or overly dense. It’s important to knead just enough to create a smooth, slightly sticky surface, indicating gluten strands are forming properly. Rushing the process or applying too much force can cause the gluten strands to break down or become overly tight, impairing their ability to trap gas during rising. Pay attention to the dough’s texture, stopping once it’s elastic and supple. Proper kneading techniques maximize gluten development without damaging the dough’s structure, leading to bread with the right rise and texture. Gluten formation is a delicate process that benefits from gentle, consistent kneading, as understanding dough elasticity can help bakers recognize when the dough is ready.
What Happens If You Over-Knead? Effects on Dough and Bread Texture
Over-kneading can substantially weaken the dough’s structure, leading to undesirable bread textures. When you over-knead, the dough’s elasticity decreases, and the gluten network becomes overly tight and fragile. This can also cause dough deterioration, making it more difficult to achieve the desired rise and texture. The result is a bread that is dense, chewy, or crumbly rather than light and airy. Here’s what happens:
- The dough loses its ability to stretch properly, making it difficult to shape. Excessive kneading can also cause the gluten strands to break down, further impairing the dough’s elasticity.
- The gluten network becomes overly tight, causing a tough crust and chewy crumb.
- The bread may collapse during baking because the weakened structure cannot hold the gas bubbles.
- Proper gluten development is essential for achieving the perfect bread texture and avoiding over-kneading issues. Over-kneading can also lead to poor fermentation, which affects the final flavor and texture of your bread.
To avoid these issues, monitor your kneading time carefully and stop once the dough is smooth and elastic. Proper gluten development ensures a balanced texture in your bread, which is essential for achieving the perfect bread texture.
Tips for Achieving Perfect Gluten in Different Types of Bread
Achieving perfect gluten development varies depending on the type of bread you’re making, so tailoring your kneading and mixing techniques is essential. For traditional wheat breads, thorough kneading helps develop a strong gluten network, ensuring good structure and chewiness. If you’re working with high-hydration doughs, gentle mixing prevents overworking the gluten and losing elasticity. For gluten-free baking, focus on alternative binders like xanthan gum or psyllium husk, as these ingredients mimic gluten’s elasticity. Be mindful of gluten allergies, which require avoiding wheat-based ingredients altogether. Adjust your techniques based on the bread’s purpose—crisp baguettes need a different approach than soft sandwich loaves. Ultimately, understanding the specific needs of each bread type helps you master gluten development for perfect results every time.
How Resting and Fermentation Help Strengthen Gluten Structure
Resting and fermentation are essential steps that allow gluten networks to develop and strengthen naturally. During this process, the dough’s gluten structure gains elasticity and strength, making it more resilient. Fermentation benefits include flavor enhancement and improved dough extensibility. To maximize these effects, keep these points in mind: 1. Resting periods give gluten time to relax and form a cohesive gluten network, reducing tearing during shaping. 2. Fermentation activates enzymes that break down proteins, improving dough extensibility and flavor. 3. Longer fermentation times promote a stronger gluten network, resulting in better dough structure and oven spring. Incorporating auditory feedback therapy techniques can also help bakers develop a more intuitive sense of dough readiness through sensory cues. Additionally, understanding the gluten development process can help bakers fine-tune their techniques for optimal results.
Troubleshooting Gluten Development Issues and How to Fix Them
Even with proper resting and fermentation, gluten development can sometimes fall short, leading to doughs that are weak, sticky, or difficult to shape. Poor gluten quality or insufficient dough hydration often cause these issues. To troubleshoot, first assess the dough’s hydration level—adding a bit more water can improve gluten elasticity if the dough feels dry or stiff. Conversely, if it’s overly sticky, reduce hydration slightly or incorporate a bit more flour. Also, consider the flour’s gluten quality; lower-quality flour may not develop strong gluten networks. You might need to knead longer or incorporate gentle stretch and folds to strengthen gluten. Adjusting these factors helps ensure your dough develops the proper gluten structure for a better rise and texture.
Frequently Asked Questions
How Does Hydration Level Affect Gluten Development?
Higher hydration levels improve gluten development by creating a better hydration balance, making the dough more extensible and elastic. When you use more water, the dough becomes stickier and softer, which helps gluten strands form more easily. Conversely, lower hydration results in a stiffer dough with less gluten structure. Pay attention to dough consistency; a well-hydrated dough will feel moist and supple, indicating ideal gluten development.
Can Using Different Flours Change Gluten Formation Times?
Yes, using different flours can change gluten formation times. Flours with higher protein content, like bread flour, develop gluten faster and more strongly, so you might not need as much kneading. Conversely, lower-protein flours, like pastry or cake flour, take longer and require a different kneading technique to develop enough gluten for structure. Adjust your kneading based on the flour’s protein level for the best results.
Does Temperature Impact Gluten Development Process?
Temperature effects play a significant role in gluten development. When your dough is warm, gluten elasticity increases, making it easier to knead and develop structure. Conversely, cooler temperatures slow down gluten formation, requiring more kneading or longer resting times. Maintaining a suitable temperature ensures consistent gluten development, resulting in a dough with good elasticity and strength. So, controlling the temperature during mixing and resting helps you achieve the perfect dough consistency.
Is There a Difference in Gluten Development for Sourdough vs. Yeast Bread?
You’ll notice that gluten structure and dough elasticity differ between sourdough and yeast bread. Sourdough’s longer fermentation creates a more complex gluten network, producing a chewier texture and richer flavor. Yeast bread develops gluten faster, resulting in a softer, lighter crumb. Both rely on gluten development, but sourdough’s extended fermentation enhances gluten’s strength and elasticity, giving you a distinctive chew and flavor. So, each method shapes your dough differently, influencing the final bread’s texture.
How Do Additives Like Fats or Sugars Influence Gluten Formation?
Additives like fats and sugars can slow gluten development, affecting dough elasticity. Fats coat flour particles, hindering gluten formation, while sugars compete for water, reducing gluten network strength. To counteract this, you should use proper mixing techniques—kneading thoroughly to develop gluten despite these ingredients. This ensures your dough remains elastic and strong enough for good structure, even with fats and sugars incorporated.
Conclusion
Mastering gluten development takes practice, but with patience, you’ll get there. For example, if you’re making sourdough and notice your dough feels tough and elastic after kneading, you’re on track. Just remember, stopping at the right moment guarantees your bread turns out light and airy. Keep experimenting with your technique, and soon you’ll confidently recognize when your dough is perfectly developed—delivering bakery-quality results every time.