To judge oil temperature without a thermometer, watch for visual cues like tiny bubbles forming around the edges, a faint haze, or a slight golden hue indicating it’s nearing ideal heat. Listen for a gentle sizzle when food hits the oil, and observe how quickly bubbles appear. If the oil smokes or bubbles wildly, it’s too hot. Recognizing these signs can help you fry perfectly every time—keep going, and you’ll learn even more tips and tricks.
Key Takeaways
- Tiny bubbles forming around the edges of the oil indicate it’s nearing frying temperature.
- A faint haze or slight golden hue signals oil is close to ideal frying temperature.
- Steady, small bubbles around food show proper heat; excessive bubbling suggests overheating.
- Smoke from the oil indicates it has surpassed the smoke point and is too hot.
- The sizzle sound when food contacts the oil confirms the oil is at the correct temperature.
oil temperature visual cues
As an affiliate, we earn on qualifying purchases.
As an affiliate, we earn on qualifying purchases.
Why Visual Cues Are Your Best Guide to Oil Temperature
Since you don’t have a thermometer, your best bet is to rely on visual cues to judge the oil’s temperature. When the oil heats up, its viscosity changes, making certain signs more noticeable. For instance, as oil gets hotter, it becomes thinner and flows more easily, which you can observe by its movement in the pan. Consistent visual cues help with sensor calibration, especially if you’re using a thermometer as a backup, ensuring your judgment remains accurate over time. Recognizing these signs saves you from guesswork and prevents overheating, which can damage food or equipment. Trusting visual cues is practical, reliable, and immediate, giving you a clear sense of when the oil reaches the right temperature without needing specialized tools. Additionally, observing the formation of tiny bubbles around the edges can indicate the oil approaching optimal frying temperature, which is a useful visual cue for many cooking applications. Understanding oil properties such as how viscosity changes with temperature can further improve your ability to judge when the oil is ready. Being familiar with these visual signs allows you to develop a more intuitive sense of temperature, especially when precise tools are unavailable.

ThermoPro Candy Thermometer with Pot Clip, 9" Long Probe Deep Fry Oil Thermometer for Frying & Candy Making, Fryer Cooking Thermometer for Liquids, Chocolate, Sugar, Caramel, Brewing & Baking
【9" Long Probe with Pot Clip】The frying thermometer for oil comes with a 9-inch probe and a secure…
As an affiliate, we earn on qualifying purchases.
As an affiliate, we earn on qualifying purchases.
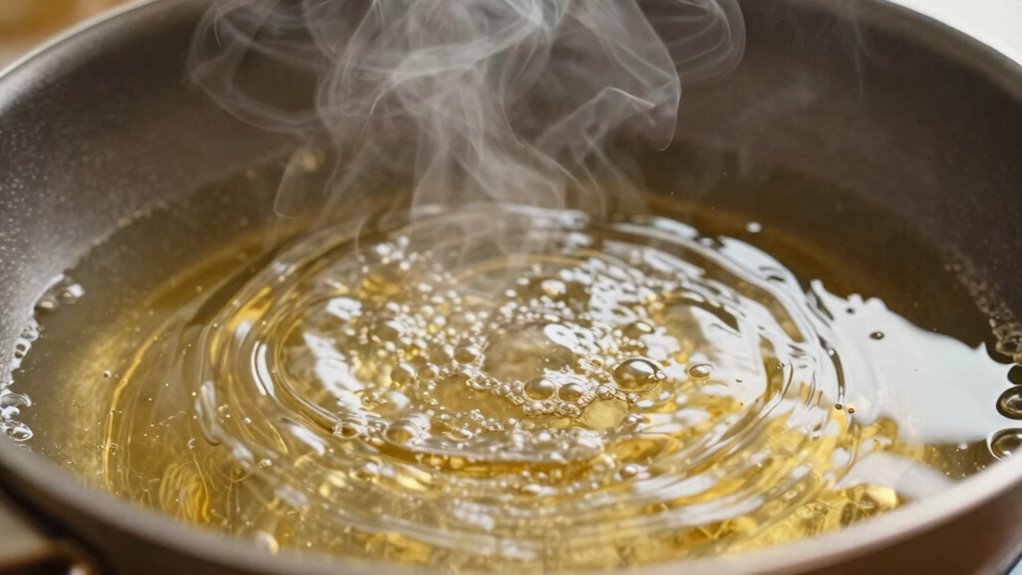
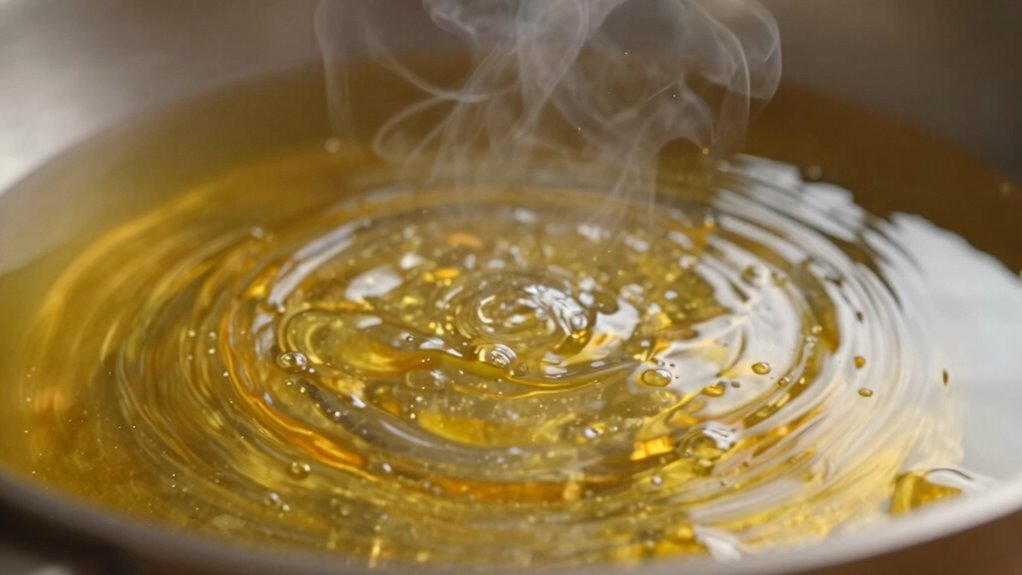
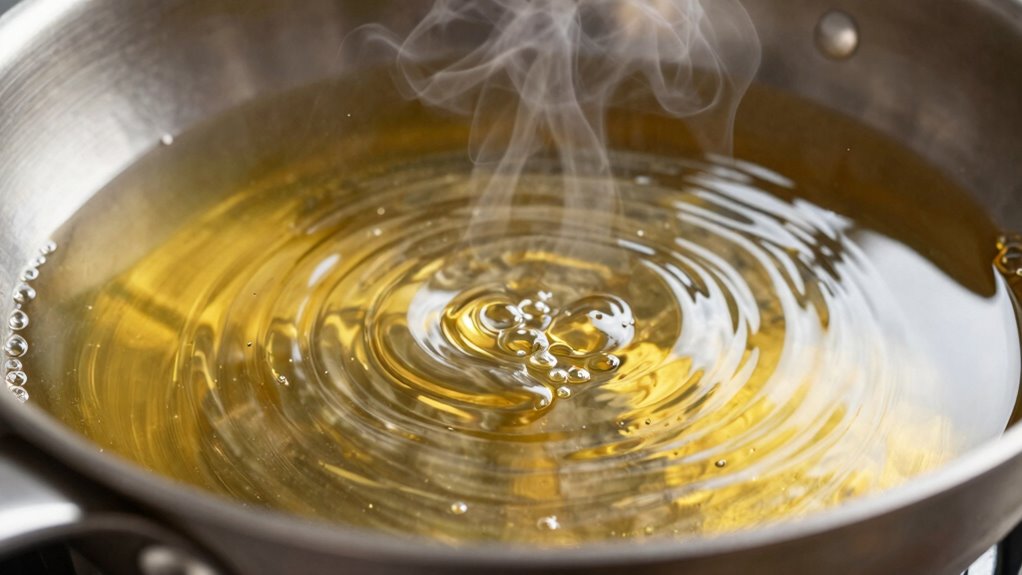
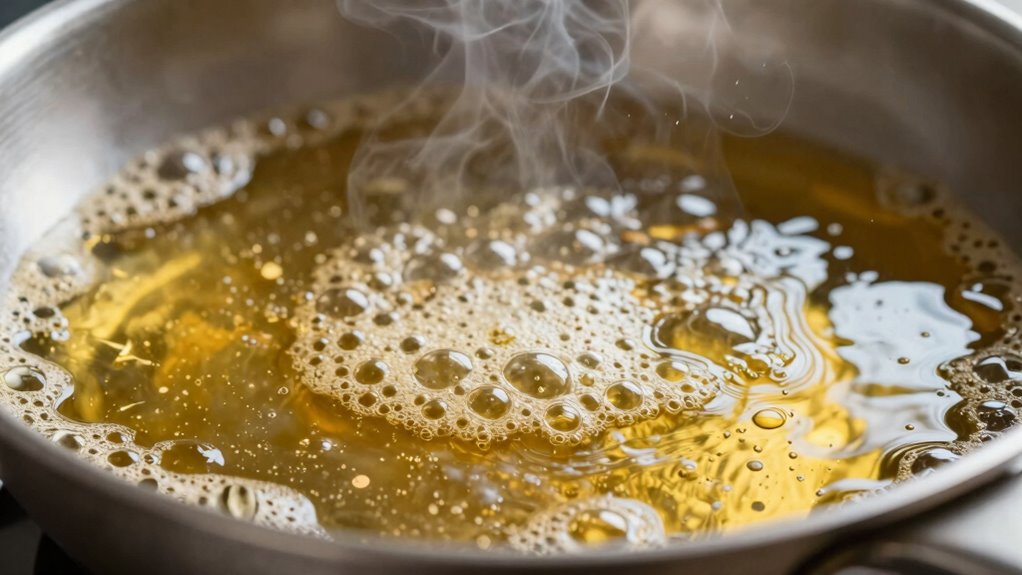
How Bubbles and Ripples Show When Oil Is Hot Enough
As the oil heats up, you’ll notice specific visual signs that indicate it’s reaching the right temperature. Bubbles formation is one of the first clues; small bubbles will start to appear at the bottom of the pan and rise steadily. These bubbles grow larger and more frequent as the oil gets hotter. Ripple patterns also form on the surface, creating gentle waves that indicate the oil is approaching *ideal* frying temperature. When you see consistent bubbles and steady ripple patterns, it’s a good sign that the oil is hot enough for cooking. Avoid waiting for smoke or excessive bubbling, which signals the oil is too hot. Monitoring these visual cues helps you achieve perfect frying results without a thermometer.

Escali AHC1 Stainless Steel Deep Frying and Candy Thermometer with Pot Clip, 5-Inch Probe with Candy Temperature Zones, NSF Certified
Temperature Range: 100° to 500°F /40° to 260°C. Probe Length: 5.5-inches Dial Diameter: 2.5-inches
As an affiliate, we earn on qualifying purchases.
As an affiliate, we earn on qualifying purchases.
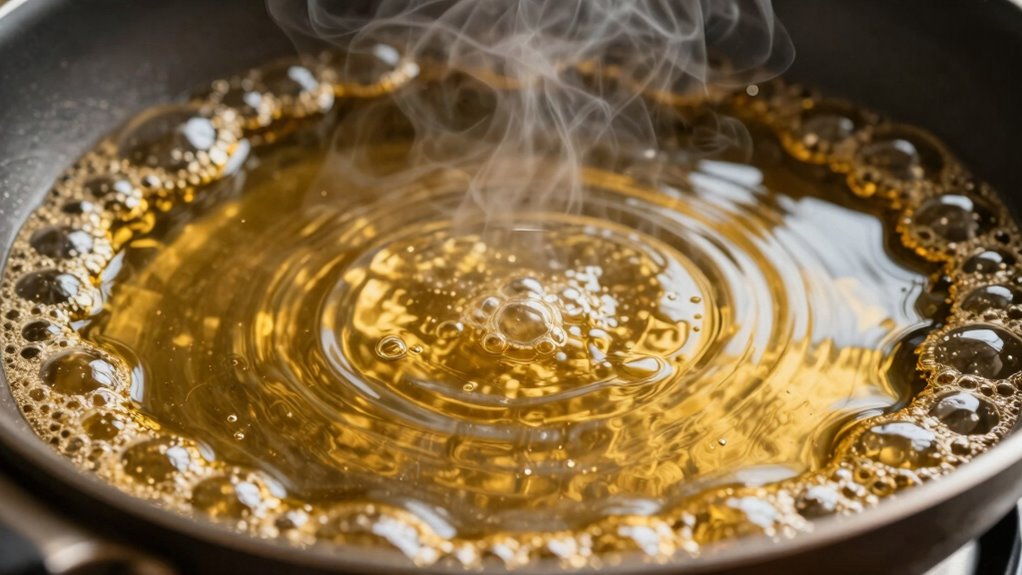
What Color Changes Reveal About Your Oil’s Readiness
When your oil reaches the right temperature, subtle color changes can serve as helpful indicators of its readiness. As the oil heats, it often develops a slight golden hue, signaling it’s approaching perfect temperature. A more noticeable color transformation occurs when the oil turns a deep amber, showing it’s hot enough for frying. Be aware of smoke indication—when the oil begins to smoke, it’s too hot and ready for immediate use, but also risking burning or splattering. These color cues are reliable visual clues: a clear, golden tone suggests ideal temperature, while a dark amber or smoke signals excess heat. Paying attention to these color changes helps you avoid overheating and ensures your oil is at the ideal point for cooking. Additionally, understanding visual cues and Free Floating techniques can help you better manage oil temperature without relying solely on visual cues. Recognizing the importance of oil temperature management through visual indicators can make your cooking process safer and more consistent. Incorporating temperature monitoring methods, such as using a thermometer or smart kitchen devices, can further enhance your control over cooking conditions and prevent mishaps. Recognizing these visual indicators allows you to develop intuition for oil readiness, making your cooking process more efficient and consistent.
Meat Temperature Guide Magnet for Smoker – Big Font Internal Temp Chart for Kitchen Cooking
Perfectly Size: 7.9 x 6.7 inches for Any Grill or Smoker. Large fonts design, no need magnifier to…
As an affiliate, we earn on qualifying purchases.
As an affiliate, we earn on qualifying purchases.
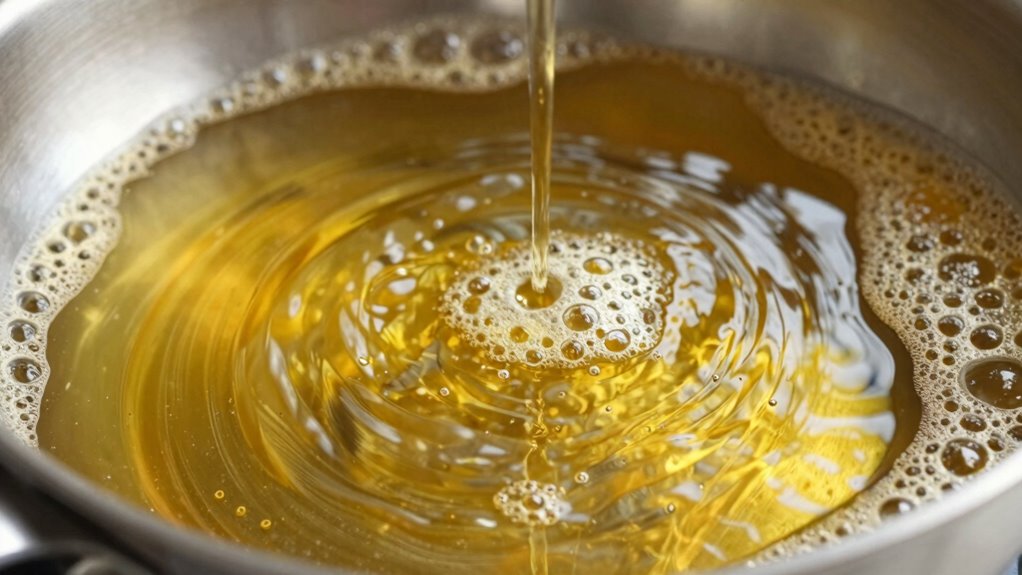
How to Test Oil With a Small Piece of Food
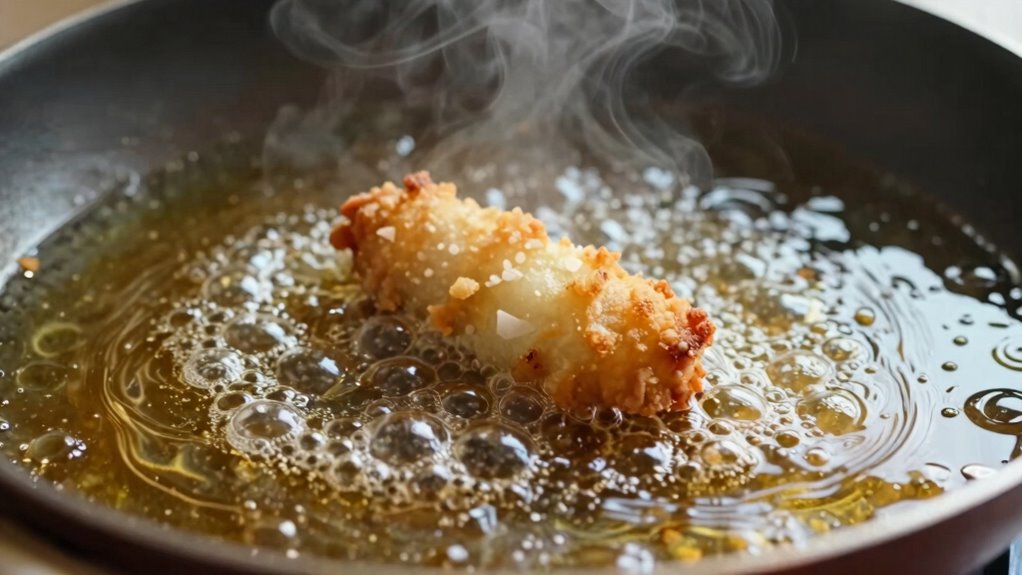
Testing your oil with a small piece of food is a simple and effective way to gauge if it’s ready for frying. When you drop the food in, observe how it behaves. If it sizzles immediately and starts to float, the oil’s viscosity is just right, and it’s hot enough. You can also check the food texture; if it begins to crisp without burning, the temperature is ideal. Monitoring the oil’s consistency helps ensure even cooking and prevents overheating. Additionally, paying attention to cultural beliefs about cooking can influence your technique and confidence in the process. Listen for a steady, gentle bubbling indicating proper heat. Watch how quickly the oil surrounds the food, showing the right viscosity. Remove the food after a few seconds to see if it starts to brown evenly. This method helps you avoid guesswork and guarantees your oil reaches the perfect temperature for frying, especially when you understand how visual cues relate to oil temperature. Recognizing proper frying techniques can further improve your results and safety. Developing an awareness of oil temperature indicators can also help you adapt your cooking to different foods and frying methods.
What to Watch for When Heating Oil
Watching your oil carefully as it heats is essential to prevent overheating or underheating. When seasoning oil, look for a gentle shimmer or light wisps of vapor, indicating it’s approaching the right temperature. Avoid letting the oil smoke, which signals it has surpassed its smoke point and may develop a burnt flavor. As the oil heats, you might see small bubbles forming around the edges; these are signs it’s close to the ideal temperature. Be attentive to the oil’s appearance and aroma. If you notice a sudden increase in bubbling or a strong smell, reduce the heat immediately. Staying alert ensures you don’t go past the *best* temperature, preserving flavor and preventing damage to the oil’s quality. Monitoring visual cues like temperature controllers and understanding safe heating practices can help maintain optimal conditions. Additionally, understanding visual cues and how the oil responds to heat can greatly enhance your ability to cook safely and effectively. Recognizing these cues is especially helpful for those who prefer manual methods over digital tools. Being familiar with cooking techniques can also improve your ability to judge the oil’s readiness by sight and smell.
Common Mistakes When Judging Oil Temperature Visually

Relying solely on visual cues to judge oil temperature can lead to common mistakes that affect your cooking results. Many cooks fall into common misconceptions, mistaking visual signals for precise temperature indicators. These visual misjudgments can cause you to add ingredients too early or too late, resulting in soggy or burnt food. Be aware of these pitfalls: – Assuming bubbling or smoke always means the oil is at the right temp, which isn’t true. – Overestimating color changes, like light shimmer, as a sign of ideal frying temperature. – Ignoring the fact that different oils behave differently visually at various temperatures. Understanding these common misconceptions helps you avoid inaccurate visual assessments and improves your frying consistency. Additionally, recognizing visual cues specific to various oils ensures that your setup remains reliable and accurate, preventing misjudgments caused by faulty equipment or improper heating. It’s also helpful to familiarize yourself with visual cues specific to different cooking scenarios to refine your judgement skills, especially when considering oil behavior at different temperatures.
Tips for Consistently Frying Perfectly Without a Thermometer
To consistently fry foods to perfection without a thermometer, focus on developing a keen sense of visual and tactile cues. Watch for oil smoke; when the oil just begins to produce a faint haze, it’s nearing the ideal temperature. Listen for the pan sizzle when you add your food—this indicates the oil is hot enough to create a crisp exterior without burning. Keep an eye on the bubbles; steady, small bubbles around the food suggest the right heat, while rapid bubbling means the oil is too hot. Adjust the heat as needed to maintain a consistent sizzle and avoid smoking oil, which signals overheating. Monitoring the performance and capability of your frying setup can help you make better heat adjustments. Developing an understanding of thermal cues is essential for mastering the art of frying without a thermometer. For example, the quality of your oil and the filtering process can influence heat retention and food quality. With practice, these cues will become second nature, helping you fry perfectly every time without relying on a thermometer.
Frequently Asked Questions
Can Visual Cues Be Reliable Across Different Types of Cooking Oils?
Yes, visual cues can be reliable across different oil types, but you need to take into account viscosity differences. Thinner oils, like vegetable oil, heat faster and show signs sooner, while thicker oils, like coconut oil, take longer. Watch for color changes, bubbling patterns, and smoke points, but remember, each oil’s unique viscosity affects these cues. Adjust your observations based on the specific oil you’re using for better accuracy.
How Does Altitude Affect the Visual Signs of Oil Temperature?
At higher altitudes, the boiling point drops, making visual cues trickier. You might see bubbles forming earlier, but the oil isn’t necessarily hot enough for frying. Altitude effects cause the oil’s appearance to change prematurely, risking undercooked food or burns. Stay vigilant, watch for rapid bubbling, and remember that the altered boiling point means visual cues aren’t as reliable, so trust your experience and adjust accordingly.
Are There Safety Concerns When Judging Oil Temperature Visually?
Yes, there are safety hazards when judging oil temperature visually. Relying solely on visual cues can lead to inaccuracies, which might cause you to add oil too early or push cooking temperatures too high. This increases the risk of splatters, burns, or even fires. To stay safe, always double-check with a thermometer if possible, and be cautious of visual inaccuracies that could mislead you about the oil’s true temperature.
How Do Impurities or Residues Influence Visual Cues of Oil Heat?
Imagine you’re frying and notice dark, burnt residue on the pan’s surface. Residue buildup and impurity effects can distort visual cues of oil heat, making it appear hotter or cooler than it actually is. These impurities can cause uneven heating, smoke, or strange odors, leading you to misjudge the oil’s temperature. Always clean your cookware regularly to guarantee accurate visual signals and maintain safe cooking conditions.
Can Visual Cues Indicate Oil Temperature for Deep-Frying Large Batches?
Yes, visual cues can help you gauge oil temperature for large batches. When the oil starts to smoke, it’s too hot, so remove it immediately. Bubbling patterns also indicate temperature: steady, consistent bubbles suggest ideal frying heat, while vigorous bubbling means the oil’s too hot. Keep an eye on these signs, but be cautious, as visual cues aren’t always precise, especially with impurities or residues affecting the oil’s appearance.
Conclusion
Did you know that relying on visual cues can help you achieve perfect frying results 80% of the time? By paying attention to bubbles, ripples, and color changes, you can confidently determine when your oil is just right—no thermometer needed. With a little practice, you’ll master the art of judging oil temperature visually, saving time and avoiding guesswork. Start observing your oil today and enjoy consistently delicious, crispy dishes every time!