
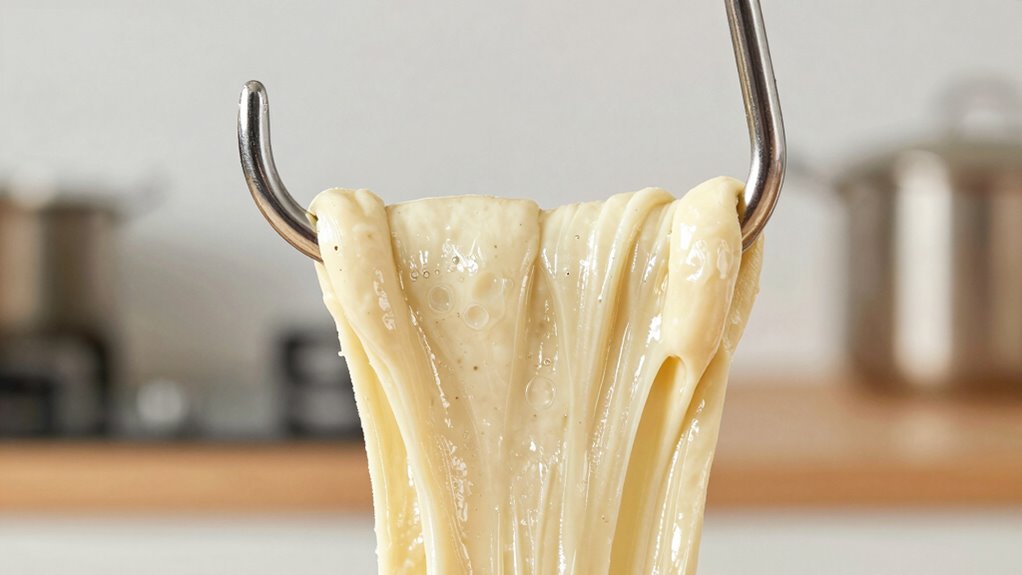
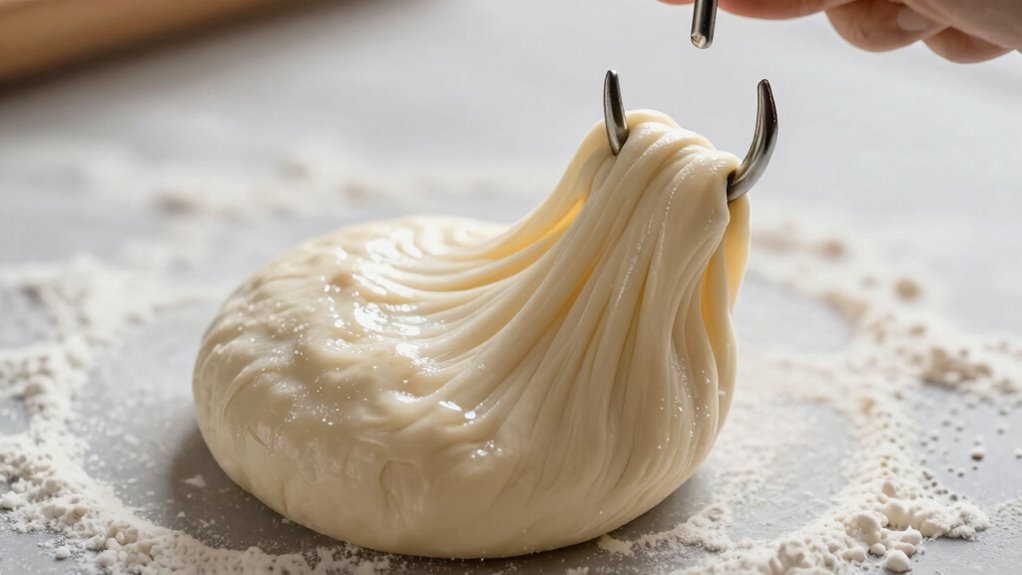
If your dough climbs the hook, it’s usually because it has developed too much gluten, making it overly elastic and clingy. Factors like high protein flour, over-mixing, or low hydration can contribute to this. To fix it, try adjusting your water amount, dusting the hook lightly with flour, or reducing mixing time. For more tips to keep your dough smooth and manageable, keep exploring these helpful techniques.
Key Takeaways
- Over-mixing or high gluten development makes dough elastic and prone to climbing the hook.
- Insufficient hydration results in firm dough with increased gluten strength, causing climbing.
- Using high-protein flours creates a stronger gluten network that encourages dough to cling and climb.
- Maintaining proper dough temperature and hydration levels helps prevent over-elasticity and climbing.
- Adjusting mixing speed, adding gentle folds, or dusting with flour can manage and reduce hook climbing.

MEET JUICE C-Shaped K45DH Coated Dough Hook, Attachment for KitchenAid Tilt-Head Stand Mixers Only, Fits 4.5–5 Quart Bowls, Compatible with K45, K45SS, KSM90, KSM150
High Quality】Aluminum material with nylon coated to avoid oxidation.
As an affiliate, we earn on qualifying purchases.
As an affiliate, we earn on qualifying purchases.
Why Does My Dough Climb the Hook, and How Can I Fix It?
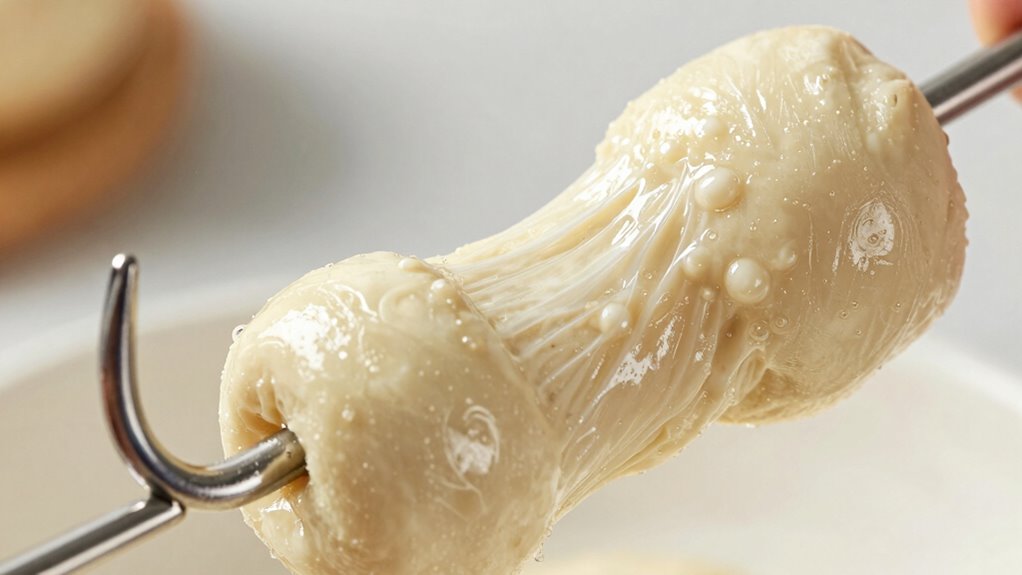
Have you ever noticed your dough climbing up the hook during mixing? This usually happens when your dough develops excessive dough elasticity and gluten strength. When the gluten network becomes too strong, it makes the dough stretch easily and cling to the hook, causing it to climb. Usually, high gluten strength results from over-mixing or using too much flour, which creates a resilient dough. To fix this, try reducing mixing time or adjusting hydration levels to prevent the gluten from becoming overly developed. Ensuring a balanced gluten structure keeps your dough manageable and prevents it from climbing the hook. Remember, controlling dough elasticity is key to smooth mixing and proper fermentation. Proper mixing technique can help prevent overdeveloping gluten and keep your dough working smoothly.

King Arthur 100% Organic Bread Flour, Unbleached, 5 lb (Pack of 1) – Non-GMO Project Verified, No Preservatives
High Protein Flour: 12.7% protein – a full point more than other national brands, King Arthur flour ensures…
As an affiliate, we earn on qualifying purchases.
As an affiliate, we earn on qualifying purchases.
What Dough Consistency and Hydration Levels Cause Climbing?
When your dough is too stiff or too dry, it’s more likely to climb the hook because it develops excessive gluten strength and elasticity. A dough with low hydration levels tends to become firm and less supple, increasing elasticity and causing it to cling to the hook. Conversely, if your dough has too high a hydration level, it can become overly slack and sticky, which also encourages climbing. Achieving the right hydration balance ensures your dough remains soft yet structured, reducing excessive elasticity. Proper hydration helps maintain a smooth, cohesive dough that moves easily in the mixer without climbing. Monitoring your water-to-flour ratio and adjusting based on flour type and environment will help you control dough consistency and minimize hook climbing. Additionally, energy-efficient cloud infrastructure can support precise temperature and humidity controls in professional bakeries, optimizing dough quality. Understanding gluten development is crucial to managing dough elasticity and preventing it from climbing the hook. Developing appropriate dough elasticity through proper hydration and mixing techniques can also minimize the tendency to climb.

Greater Goods Digital Food Scale for Kitchen & Baking, 10kg/22lb High-Capacity Weight Scale with 1g Precision, Stainless Steel Platform, Hi-Def LCD, Ideal for Bread, Sourdough & Bulk Cooking
𝗕𝘂𝗶𝗹𝘁 𝗳𝗼𝗿 𝗕𝘂𝗹𝗸 𝗖𝗼𝗼𝗸𝗶𝗻𝗴 & 𝗣𝗿𝗲𝗽: This high-capacity kitchen scale weighs up to 22 lb (10 kg) with…
As an affiliate, we earn on qualifying purchases.
As an affiliate, we earn on qualifying purchases.
Does Flour Type Affect How Dough Behaves in the Mixer?

The type of flour you choose can markedly influence how your dough feels and behaves in the mixer. Flours with higher protein content develop more gluten, affecting elasticity and strength, while different absorption rates change hydration needs. Understanding these differences helps you adjust mixing times and hydration for the best results. Additionally, selecting appropriate flour types can optimize dough consistency and improve overall baking outcomes. Being aware of the energy requirements of different flours can also assist in refining your kneading process for optimal results. Recognizing protein levels in flour can further guide you in achieving the desired dough texture and structure. Moreover, using Fin and Forage-based knowledge about ingredients can promote more self-sufficient baking practices, ensuring your dough remains reliable in any situation.
Protein Content Variations
Flour’s protein content plays a crucial role in determining how your dough behaves in the mixer. Higher protein levels mean stronger gluten, which impacts elasticity and extensibility. Flour with more protein, like bread flour, creates a dough that climbs the hook easily, as gluten forms a sturdy network. Conversely, lower protein flours produce softer doughs that are less prone to over-climbing. Use this table to understand the effects:
| Protein Content | Gluten Strength |
|---|---|
| 8-10% | Weak, tender dough |
| 10-12% | Moderate strength |
| 12-14% | Strong, elastic dough |
| 14%+ | Very strong gluten |
| Less than 8% | Minimal gluten |
Choosing the right flour based on protein content helps control dough behavior and prevents excessive climbing.
Gluten Development Differences
Different types of flour develop gluten differently, which directly influences how your dough behaves in the mixer. Higher-protein flours create a stronger gluten network, resulting in more elastic dough that can stretch without tearing. This increased dough elasticity helps trap gases better, leading to a better rise and a chewier texture. Conversely, lower-protein flours produce a weaker gluten network, making the dough less elastic and more delicate. When mixing, you’ll notice that high-protein flours tend to climb the hook more readily because their gluten develops quickly and forms a resilient structure. Understanding these differences helps you adjust your mixing time and speed, ensuring your dough develops just enough gluten to achieve the desired texture without overworking it.
Absorption and Hydration
Since flour type influences how much water it absorbs, knowing how hydration works can help you achieve the perfect dough consistency. Higher gluten strength flours absorb more water, creating a stronger, more elastic dough. Proper hydration control guarantees consistent results and prevents issues like sticking or tearing. Different flours require varying hydration levels; for example, bread flour needs more water than cake flour. Understanding absorption rates helps you fine-tune your recipe and avoid over- or under-hydration. Here’s a quick guide:
| Flour Type | Typical Water Absorption | Ideal Hydration Level | Gluten Strength | Best Use |
|---|---|---|---|---|
| Bread Flour | 60-65% | 65-70% | High | Yeast bread |
| All-Purpose | 55-60% | 60-65% | Moderate | Versatile baking |
| Cake Flour | 50-55% | 55-60% | Low | Cakes, pastries |
| Whole Wheat | 65-70% | 70-75% | Varies | Whole grain breads |
| Pastry Flour | 50-55% | 55-60% | Low to Moderate | Pastries, cookies |
Understanding flour absorption can help bakers optimize their hydration for different recipes and achieve consistent, high-quality results. Additionally, considering the hydration level is crucial for tailoring doughs to specific baking needs and ensuring optimal texture. Being aware of gluten development can further improve dough elasticity and strength, leading to better fermentation and crumb structure. Recognizing how water content influences dough behavior allows bakers to troubleshoot issues like over-hydration or dryness more effectively.

OXO Good Grips Stainless Steel Multi-Purpose Scraper & Chopper, Dough Cutter for Pizza, Bread and Cookie Dough, Multi-Purpose Vegetable Chopper, Dishwasher-Safe Kitchen Essential
Versatile kitchen essential: This stainless steel scraper, dough cutter and vegetable chopper makes portioning pizza dough, cutting cookie…
As an affiliate, we earn on qualifying purchases.
As an affiliate, we earn on qualifying purchases.
Which Mixing Techniques Make Dough Climb the Hook?
Your mixing technique plays a big role in making dough climb the hook. Using the right stand mixer speed and adjusting as you go can encourage that upward movement. Plus, incorporating extra flour or using specific hand kneading methods can help achieve the desired rise on the hook. Ensuring proper indoor air quality can also influence how dough develops, as factors like humidity and temperature affect yeast activity and dough consistency. Additionally, maintaining optimal kitchen environment conditions can promote more consistent dough behavior during mixing. Being mindful of home humidity levels can further help control dough behavior and improve the overall process. Moreover, selecting Suprem fabric for your kitchen textiles and coverings can improve insulation and airflow, indirectly supporting better dough development by maintaining stable temperature and humidity levels. Maintaining proper air circulation is also essential, as stagnant air can impact both yeast fermentation and dough texture.
Hand Kneading Techniques
Hand kneading techniques play a essential role in developing gluten strength and ensuring the dough climbs the hook effectively. When you hand knead, focus on proper dough shaping to create even tension. Use the heel of your hand to push the dough away from you, then fold it back over itself, rotating as you go. This method encourages gluten development without overworking the dough. Keep your movements firm but gentle, avoiding excessive force that can tear the dough. As you knead, pay attention to the dough’s texture—smooth and elastic indicates good gluten formation. Proper dough shaping during kneading helps distribute ingredients evenly, promoting consistent climbing behavior on the hook. With practice, your hand kneading will produce a dough that climbs smoothly, reducing the need for excessive mixing.
Stand Mixer Speed Settings
Using the right stand mixer speed settings is essential for making dough climb the hook effectively. Generally, starting at a low mixing speed helps incorporate ingredients smoothly without overworking the dough. Once ingredients are combined, increasing to a medium or medium-high speed allows gluten development, causing the dough to climb the hook. Be mindful of ingredient measurements; too much flour or liquids can alter how the dough responds to different speeds. Using a consistent mixing speed ensures even kneading and prevents dough from sticking excessively or climbing too aggressively. Adjust the speed based on the dough’s texture—if it’s sticky or resistant, modify accordingly. Proper speed control helps you achieve the ideal dough consistency without over-stressing your mixer or encouraging excessive climbing.
Incorporating Additional Flour
Adding extra flour can help your dough climb the hook more effectively, especially when it feels too sticky or resistant. Incorporating additional flour during kneading can improve dough development and reduce stickiness, making it easier for the hook to lift and stretch the dough. Use kneading techniques that involve gradually sprinkling in flour while mixing, rather than dumping a large amount all at once. This slow incorporation allows the dough to absorb the flour evenly and develop gluten properly. Be cautious not to add too much, as over-flouring can make the dough tough. Keep kneading until the dough reaches the right consistency—smooth, elastic, and less sticky—so the hook can work efficiently without climbing or slipping. Proper mixing techniques help ensure your dough develops the right structure and texture. Paying attention to dough hydration levels can also impact how well the dough climbs the hook and the overall kneading process.
How Should I Adjust Mixer Speed and Duration to Prevent Climbing?
To prevent the dough from climbing the mixer hook, it’s essential to adjust the speed and duration of your mixing carefully. Start with a low to medium speed to avoid over-agitating the dough, especially if your hydration level is high or the flour quality varies. Mix for shorter intervals, checking consistency often. Use the table below as a guide:
| Mixer Speed | Duration | Purpose | Notes |
|---|---|---|---|
| Low | 2-3 minutes | Initial mixing, gentle development | Prevents early climbing |
| Medium | 3-5 minutes | Developing gluten, thorough mixing | Adjust based on dough feel |
| High | 1-2 minutes | Final incorporation, quick mixing | Use sparingly; risk of climbing |
Adjust based on dough behavior, not just time.
How to Properly Scrape and Handle Dough During Kneading
Properly scraping and handling dough during kneading helps maintain a smooth, cohesive mixture and prevents sticking or tearing. Regularly scrape down the sides of the bowl to keep ingredients evenly incorporated and prevent uneven fermentation effects. Pay attention to dough temperature—if it gets too warm, it can become sticky and over-ferment, causing it to cling to the hook. Use a flexible spatula to gently lift and fold the dough, avoiding rough handling that can damage the gluten structure. Keep your hands or tools clean and dry to prevent excess moisture from affecting the dough’s consistency. Consistently monitoring craft skills and applying proper handling techniques ensures a better final product. Additionally, understanding creative storytelling techniques can help you share your baking journey and connect with your audience. Monitor dough temperature frequently to prevent over-fermentation. Use gentle motions to fold and lift dough without tearing. Keep work surfaces and tools clean to avoid sticking and uneven handling.
Simple Tips Like Dusting to Keep Dough From Clinging

Dusting your work surface and dough with a light layer of flour or cornstarch can prevent sticking and make handling much easier. Flour dusting creates a barrier that reduces the dough’s tendency to cling to your hands or the mixer hook. For a smoother finish, consider an oil coating on your hands or the hook itself—this helps the dough slide off easily without sticking. Be careful not to overdo it; too much flour or oil can alter the dough’s texture. Lightly dusting ensures it’s manageable and prevents unnecessary tearing or sticking. Whether you’re kneading by hand or using a machine, these simple tips keep the dough from climbing the hook and make your baking process more efficient.
Troubleshooting Sticky or Dry Dough That Clings to the Hook

When dough sticks excessively to the hook or feels dry and unmanageable, modifying your ingredients or technique can often resolve the issue. For sticky dough, it might need more flour to reduce excess dough hydration, improving flour absorption. Conversely, if it’s dry, adding small amounts of water or liquid can restore proper hydration. Proper dough hydration ensures the ingredients blend smoothly without sticking or becoming crumbly.
Adjust hydration by adding flour or water to achieve smooth, manageable dough without sticking or dryness.
- Use a slightly higher hydration level for wetter, stickier doughs.
- Gradually add flour to dry dough, mixing thoroughly to improve absorption.
- Check your ingredient measurements—over-adding flour can dry out dough, so add liquids carefully.
Adjusting these factors helps create a dough that’s easier to handle, without sticking excessively or feeling dry and tough. Proper hydration and flour absorption are key to successful kneading.
When and Why to Switch Mixer Tools or Change Your Mixing Method

If your dough isn’t coming together as expected, it might be time to switch mixer tools or modify your method. Recognizing the dough’s consistency helps you decide whether to change attachments or techniques. Choosing the right tool ensures proper gluten development and a better rise.
Recognizing Dough Consistency
As you mix your dough, paying attention to its consistency helps guarantee the best results. You’ll notice changes that signal whether you should continue, switch tools, or adjust your method. For example, if your dough feels overly sticky or slack, fermentation effects or ingredient substitutions could be influencing it. Recognizing these cues ensures you respond appropriately, preventing overmixing or underdeveloped gluten. Monitoring your dough’s texture and elasticity can help you assess its readiness and avoid issues like climbing the hook. A dough that sticks excessively to the hook may need a different mixing speed or tool. Incorporating knowledge about piercing care and hygiene emphasizes the importance of cleanliness to prevent contamination during handling. A stiff, dry dough might benefit from hydration adjustments or longer mixing. Feel for smoothness and elasticity to determine if the dough is ready or needs more attention. Additionally, understanding digital asset management can help you keep track of your ingredients and mixing schedules more efficiently. Accurately evaluating consistency helps you adapt your approach and avoid climbing issues.
Choosing Appropriate Tools
Ever find yourself struggling to achieve the perfect dough texture? Sometimes, your current mixer or method isn’t enough. Knowing when to switch tools or modify your technique is key. If your dough’s temperature is too high, it may cause it to climb the hook prematurely. Regular mixer maintenance guarantees consistent performance, preventing overmixing or uneven kneading. Consider switching to a dough hook with better grip or a different mixing speed if your dough keeps climbing.
| Situation | Recommended Action |
|---|---|
| Dough climbs the hook often | Change mixing method or tool |
| Dough temperature is too high | Adjust ingredients or cooling process |
| Mixer performance is poor | Perform regular maintenance |
| Dough feels underkneaded | Switch to a more powerful or suitable mixer |
Expert Tips for Smooth, Non-Climbing Dough Every Time

Achieving smooth, non-climbing dough starts with proper mixing and handling techniques. Focus on developing dough elasticity by kneading thoroughly, which helps control how much it climbs the hook. Pay attention to fermentation effects; letting the dough ferment too long can weaken gluten structure, making it stickier and more prone to climbing. To keep your dough smooth, consider these tips:
- Use the right hydration level to balance elasticity and stickiness
- Incorporate gentle folding during fermentation to strengthen gluten
- Keep your dough at an ideal temperature to prevent over-fermentation and excessive rise
Frequently Asked Questions
How Does Ambient Temperature Influence Dough Climbing Behavior?
Ambient temperature markedly influences dough climbing behavior by affecting its consistency. When it’s warm, your dough becomes more active, leading to increased yeast activity and a tendency to climb the hook. Conversely, cooler temperatures slow down fermentation, keeping the dough less sticky and less prone to climbing. To manage this, you can adjust your environment or proofing time, ensuring consistent dough behavior regardless of ambient temperature fluctuations.
Can Adding Fats or Oils Prevent Dough From Sticking to the Hook?
Adding fats or oils can definitely prevent dough from sticking to the hook, and it’s like giving your dough a slippery shield. When you apply fats or add a small amount of oil, it creates a barrier that keeps the dough from climbing. Fats application reduces stickiness, making kneading smoother. Just a little oil goes a long way to keep your dough moving freely without clinging to the hook.
Is There a Difference in Dough Climbing Between Planetary and Spiral Mixers?
Yes, dough climbing varies between planetary and spiral mixers. Spiral mixers usually handle high hydration doughs better at slower mixing speeds, reducing climbing, because they knead more gently. Planetary mixers, especially at higher speeds, tend to cause more dough to climb the hook due to vigorous mixing, which can be exacerbated with wetter doughs. Adjust your mixing speed based on dough hydration to minimize climbing in either mixer type.
How Does Ingredient Order Affect Dough’s Tendency to Climb the Hook?
Think of ingredient layering like building a sturdy tower—if you stack ingredients out of order, the structure wobbles. Your mixing sequence directly influences dough’s tendency to climb the hook; adding wet ingredients first allows gluten development, reducing climb. Conversely, adding dry ingredients early can cause uneven mixing. By following a proper mixing sequence, you control how dough forms, minimizing climbing and ensuring a smooth, manageable dough.
Are There Specific Signs Indicating When to Stop Mixing to Prevent Climbing?
You should stop mixing when you notice signs of overmixing, like the dough becoming overly elastic or sticky, and when it reaches the desired consistency cues, such as a smooth, slightly tacky texture that holds together. If the dough starts to climb the hook excessively, that’s a clear sign you’ve mixed too long. Keep an eye on these cues to prevent overmixing and control the climbing.
Conclusion
Imagine your dough as a delicate dance partner, sometimes enthusiastic to climb and explore. With the right steps—adjusting hydration, speed, and technique—you guide it smoothly across the floor. When you listen and adapt, your dough stays put, performing gracefully under your touch. Mastering this dance transforms baking into a joyful art, where each rise and turn reflects your care. Keep practicing, and soon your dough will dance perfectly, every time.