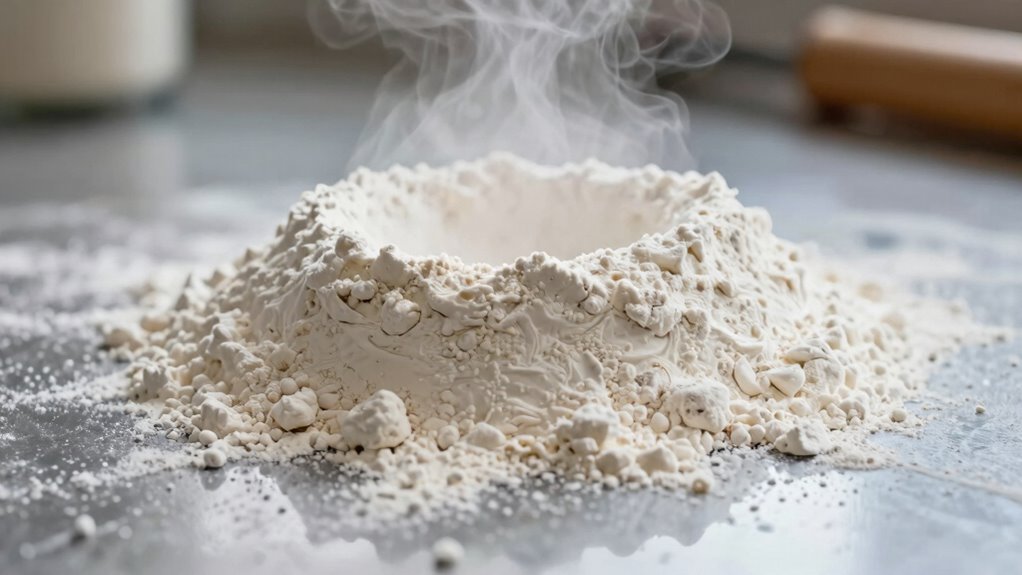
The temperature of flour right after milling influences your dough’s quality, fermentation, and final bake. Warm flour speeds up enzyme activity and fermentation but can weaken gluten or cause spoilage, while cold flour slows fermentation and may hinder dough development. Maintaining the right temperature (around 60-70°F) guarantees consistent results. If you keep your flour within this range, you’ll get better texture and flavor. Keep going to discover how to control and measure this critical factor for baking success.
Key Takeaways
- Proper flour temperature preserves gluten structure, ensuring optimal dough consistency and elasticity.
- Cooler flour maintains enzyme activity and nutrients vital for fermentation, leading to better rising.
- Excessive heat during milling can weaken dough and cause uneven baking results.
- Monitoring flour temperature helps prevent overproofing or underdevelopment of the dough.
- Consistent flour temperature supports predictable baking outcomes and overall product quality.
digital flour temperature thermometer
As an affiliate, we earn on qualifying purchases.
As an affiliate, we earn on qualifying purchases.
Why Your Flour’s Temperature After Milling Affects Dough Quality
When flour is too warm after milling, it can negatively impact dough quality. Warm flour accelerates enzyme activity, which can weaken gluten development and reduce dough elasticity. Maintaining optimal flour freshness depends heavily on proper milling techniques that minimize heat buildup. Modern milling methods, like air-jet or roller milling, aim to keep flour cool during processing. If flour heats up excessively, it can lead to staling or spoilage before use, affecting baking results. Cooler, fresher flour retains more of its natural enzymes and nutrients, which are essential for proper fermentation and gluten formation. Additionally, controlling milling temperature supports product consistency and preserves flour’s functional properties. Proper milling techniques are crucial for keeping flour at the ideal temperature, ultimately improving your baked goods. Ensuring that the milling process is efficient also helps prevent heat buildup, which can compromise flour quality and enzymatic activity. Understanding milling temperature control is key to maintaining flour quality from processing through baking, especially since enzyme activity influences dough behavior and final product texture.
kitchen flour storage container
As an affiliate, we earn on qualifying purchases.
As an affiliate, we earn on qualifying purchases.
What’s the Ideal Flour Temperature Range for Baking Success?

The ideal flour temperature for baking usually falls between 60°F and 70°F. Staying within this range helps guarantee proper dough fermentation and consistent rise. Managing flour warmth is key to achieving peak baking results every time. Additionally, using a precise temperature thermometer can help ensure your flour remains within the optimal range, enhancing your baking consistency. Properly stored flour at the correct temperature also minimizes moisture absorption, which can affect dough texture and fermentation. Maintaining appropriate storage conditions supports baking quality and reduces the risk of spoilage.
Optimal Temperature Range
Have you ever wondered what the ideal flour temperature is for perfect baking results? The recommended range typically falls between 75°F and 85°F (24°C-29°C). Maintaining this range ensures consistent dough handling and quality. To achieve this, consider these factors:
- Grain moisture levels affect how quickly flour heats during milling.
- Higher milling speeds generate more heat, raising the flour temperature.
- Cooler grain moisture can help keep flour within the ideal range.
- Proper equipment calibration prevents overheating during milling.
- Vetted milling practices and equipment maintenance help maintain consistent flour temperatures, ensuring optimal baking outcomes. Additionally, understanding the contrast ratio of your equipment can influence how you evaluate the visual quality of baked goods, especially in professional settings.
- Thermal regulation during milling is essential for preserving flour’s natural enzymes and moisture balance. This control prevents dough issues like poor fermentation or uneven texture, giving you the best foundation for successful baking. Recognizing the impact of temperature control on flour quality helps optimize your process and results. Furthermore, implementing sound hygiene practices can also prevent contamination and spoilage during storage and handling.
Effects on Dough Fermentation
Maintaining the ideal flour temperature range is essential because it directly influences the fermentation process of your dough. When flour is within this range, yeast activity proceeds best, producing the desired rise and flavor. Too warm, and the yeast ferments too quickly, risking overproofing; too cold, and fermentation slows considerably. Grain moisture and milling speed affect flour temperature, impacting fermentation. Higher moisture can retain heat, while faster milling generates more heat, both elevating the flour’s temperature. Here’s a quick overview:
| Factor | Effect on Fermentation |
|---|---|
| Grain Moisture | Higher moisture retains heat, speeds fermentation |
| Milling Speed | Faster milling increases heat, accelerates fermentation |
| Temperature Range | Suitable for consistent yeast activity |
| Over/Under Heating | Disrupts proper fermentation process |
Understanding the milling process can help bakers control heat generation and maintain optimal flour temperature. Proper grain storage methods also contribute to stable flour temperature by preventing moisture fluctuations and temperature spikes, ensuring consistent fermentation. Additionally, knowing the net worth of individuals involved in the milling industry can provide insights into the economic aspects that influence grain production and storage practices.
Managing Flour Warmth
To achieve consistent fermentation and ideal dough development, keeping flour within the optimal temperature range is essential. When milling, factors like grain moisture and milling speed influence flour warmth. Managing this warmth ensures predictable baking results. Consider these key points:
- Maintain flour temperature between 60-75°F (15-24°C) for best fermentation.
- Higher grain moisture can increase flour warmth, so adjust storage accordingly.
- Slower milling speeds generate less heat, helping preserve ideal temperature.
- Use cooling techniques, such as airflow or refrigeration, if flour exceeds the optimal range.
baking dough thermometer
As an affiliate, we earn on qualifying purchases.
As an affiliate, we earn on qualifying purchases.
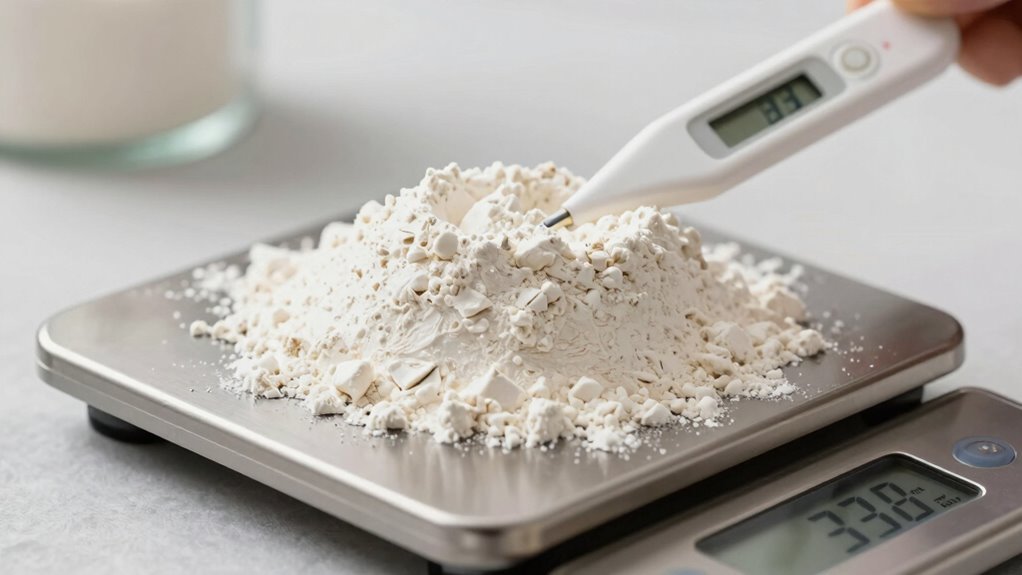
How to Measure Flour Temperature Accurately After Milling
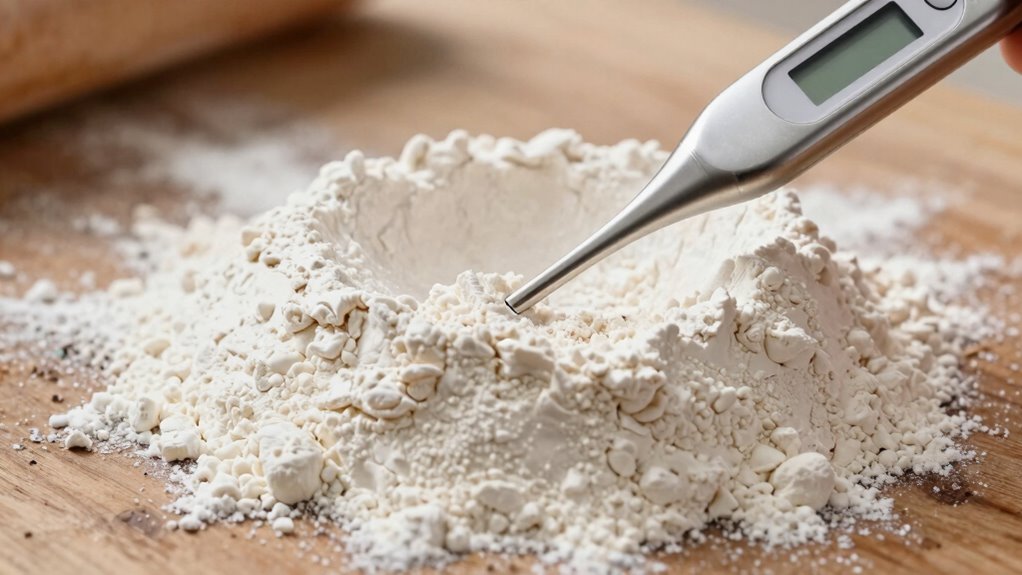
Accurately measuring flour temperature after milling is essential for guaranteeing ideal baking quality. To get precise readings, use a high-quality digital or infrared thermometer designed for surface or internal measurements. Before measuring, guarantee the flour has cooled to room temperature, avoiding excess heat from milling equipment. Keep in mind that grain moisture and ambient humidity can influence temperature readings; higher humidity may cause slight fluctuations. Take measurements in a consistent manner, ideally in a shaded environment to avoid sunlight interference. Gently stir the flour before testing to distribute temperature evenly. Record the reading immediately to prevent environmental factors from affecting the result. Regular calibration of your thermometer also helps maintain accuracy, ensuring your flour’s temperature is reliably monitored for optimal baking outcomes. Additionally, understanding luggage & bags options can help if you’re transporting baking supplies or equipment on the go. Proper storage and handling of flour can also impact its freshness and quality, which are closely linked to temperature control. Incorporating temperature stability techniques during storage can further preserve flour’s properties and improve baking consistency. Employing smart home solutions such as climate-controlled storage units can help maintain consistent temperature and humidity levels, ensuring optimal flour quality over time.
flour milling temperature control device
As an affiliate, we earn on qualifying purchases.
As an affiliate, we earn on qualifying purchases.
Easy Ways to Keep Your Flour at the Perfect Temperature

To keep your flour at the ideal temperature, store it in a cool, dry place away from heat sources. Using airtight containers helps maintain a consistent temperature and prevents moisture from affecting it. These simple steps make sure your flour stays fresh and at the right temperature for baking. Additionally, avoiding fluctuations in temperature during storage can help preserve its quality over time temperature maintenance. Ensuring proper air purifier maintenance in your storage area can also contribute to maintaining the optimal environment for your flour.
Store in Cool, Dry Place
Ever wondered how to keep your flour fresh and flavorful? Storing it in a cool, dry place is key. To do this effectively, consider these tips:
- Keep your flour away from heat sources like ovens or direct sunlight.
- Choose flour storage containers that protect against moisture and pests.
- Maintain low storage humidity to prevent spoilage.
- Regularly check your storage area for any signs of dampness or mold.
Use Airtight Containers
Using airtight containers is one of the simplest ways to keep your flour fresh and maintain the right temperature. Airtight storage prevents moisture, pests, and temperature fluctuations that can spoil flour. Proper temperature control is essential for preserving flour’s quality and preventing it from becoming rancid or losing its baking power. Choose containers with tight seals to guarantee no air enters.
| Benefit | Explanation |
|---|---|
| Keeps flour dry | Prevents moisture from causing mold or clumping. |
| Maintains freshness | Stops exposure to air, preserving flavor and aroma. |
| Prevents pests | Keeps insects and rodents away. |
| Ensures consistency | Maintains ideal temperature for better baking results. |
Common Mistakes That Cause Unwanted Flour Temperatures
One common mistake that leads to unwanted flour temperatures is neglecting proper milling conditions. Poor control of grain moisture and milling speed can substantially raise flour temperature. Here are key errors to avoid:
- Using overly dry or moist grain, which affects heat transfer.
- Milling at too high a speed, generating excess friction and heat.
- Failing to monitor grain moisture levels regularly.
- Ignoring equipment temperature, allowing heat buildup.
These mistakes cause the flour to warm rapidly, impacting dough consistency and fermentation. Maintaining ideal grain moisture ensures efficient milling, while controlling milling speed minimizes heat generation. Regularly checking equipment temperature can prevent overheating. Avoiding these pitfalls helps you produce flour with a stable, desired temperature, ensuring better baking outcomes.
How to Adjust Your Recipe and Process When Flour Is Warm or Cold

When your flour is warmer or colder than expected, it can throw off your baking process and final results. To compensate, adjust your recipe based on grain moisture and milling speed. Warmer flour may have higher grain moisture, leading to a softer dough, so reduce water slightly. Colder flour might need extra hydration. Use this table to guide adjustments:
| Flour Temperature | Adjustment Tip |
|---|---|
| Warm | Decrease water, increase kneading time |
| Cold | Slightly increase water, warm flour before mixing |
| Slightly warm | Slightly reduce flour or add a touch more water |
| Slightly cold | Add a small amount of warm water to dough |
| Very warm or cold | Adjust milling speed for consistent grain moisture |
These tweaks help you maintain consistent dough texture and fermentation, regardless of flour temperature.
Tips for Consistently Maintaining Flour Temperature for Reliable Baking

Maintaining a consistent flour temperature is key to ensuring reliable baking results, especially after adjusting your process for flour warmth or chilliness. To achieve this, consider these tips:
- Store flour in a cool, dry environment with controlled humidity to prevent moisture fluctuations that impact grain moisture and temperature.
- Use a thermometer to monitor storage conditions regularly, ensuring ideal temperature levels.
- Allow flour to acclimate to room temperature before baking, especially if stored in a cooler or warmer space.
- Keep flour tightly sealed to prevent exposure to humidity changes that can alter grain moisture and influence temperature consistency.
Frequently Asked Questions
Can Flour Temperature Influence the Flavor of Baked Goods?
Yes, flour temperature can influence the flavor of baked goods. When flour is warmer, it may accelerate enzyme activity, impacting flavor development and aroma retention. Cooler flour helps preserve subtle flavors and keeps aroma compounds intact, resulting in a more nuanced taste. By controlling flour temperature after milling, you guarantee your baked goods have better flavor complexity and aroma, making your final product more appealing and aromatic.
How Does Ambient Humidity Affect Flour Temperature After Milling?
Ambient humidity impact directly influences flour temperature after milling; higher humidity levels introduce moisture, increasing the flour’s temperature and potentially affecting dough consistency. Moisture effects can cause the flour to retain heat longer, leading to uneven temperatures. When humidity is low, flour stays cooler, which may alter how it interacts with other ingredients. You should monitor humidity to maintain ideal flour temperature, ensuring consistent baking results and better dough handling.
Is There a Difference in Flour Temperature Between Different Milling Methods?
Like a painter choosing brushes, your milling technique influences flour temperature and creates a canvas of temperature variation. Different methods, such as stone milling or roller milling, generate varying heat levels due to friction and process speed. You’ll notice that some techniques produce cooler flour, ideal for delicate doughs, while others cause more heat, affecting gluten development. So, selecting the right method helps you control flour warmth and dough quality.
What Equipment Best Maintains Consistent Flour Temperature During Storage?
You should use storage containers designed for consistent temperature regulation, such as those with insulated walls or airtight seals. Pair them with advanced temperature control systems that monitor and maintain stable conditions, preventing fluctuations that could affect flour quality. By combining proper storage containers with reliable temperature control systems, you guarantee your flour stays at an ideal temperature, preserving its properties for better dough consistency and baking results.
How Soon Should Flour Be Used After Milling to Ensure Optimal Temperature?
You should use flour within 24 hours of milling to maintain ideal temperature and freshness. Coordinating your milling schedule with storage timing helps keep the flour cool and stable, preventing temperature fluctuations that could affect dough quality. By doing so, you guarantee your flour remains at the right temperature, leading to better fermentation, improved texture, and consistent baking results. Don’t delay—timely use maximizes flour’s potential.
Conclusion
Keeping your flour at the right temperature is like tuning a finely crafted instrument—you’ll produce a harmonious dough every time. By measuring accurately and adjusting your process, you control the rhythm of your baking. Don’t let warm or cold flour throw you off beat. Stay vigilant, and your baked goods will rise to perfection, turning simple ingredients into a symphony of deliciousness with each bake.