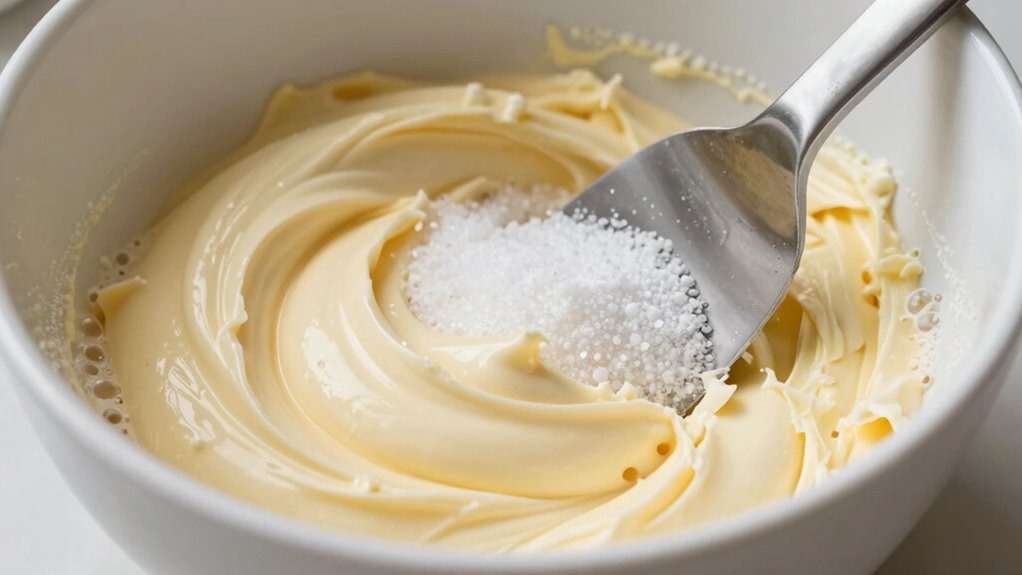
When you cream butter and sugar, you’re mixing and aerating them to create a light, fluffy texture that helps baked goods rise and turn tender. This process traps tiny air bubbles into the mixture, which expand during baking. Proper creaming involves using softened butter and fine sugar, beating on medium speed until the mixture is pale and airy. Keep going, and you’ll discover the key techniques to perfect this essential baking step.
Key Takeaways
- You’re blending softened butter and sugar until the mixture becomes pale, fluffy, and increased in volume.
- The process traps tiny air bubbles that expand during baking, helping baked goods rise and become tender.
- Proper creaming involves beating at medium speed until the mixture is smooth, light, and aerated.
- Using room temperature butter and fine sugar ensures efficient mixing and optimal air incorporation.
- The goal is to create a light, airy base that improves texture and volume in your final baked product.

Hamilton Beach 6-Speed Electric Hand Mixer with Whisk, Traditional Beaters, Snap-On Storage Case, 250 Watts, White
NO MORE LOST BEATERS: The snap-on storage case that comes with the Hamilton Beach hand mixer neatly holds…
As an affiliate, we earn on qualifying purchases.
As an affiliate, we earn on qualifying purchases.
What Is Creaming, and Why Is It Important?
Have you ever wondered what makes your baked goods light and fluffy? It all starts with creaming, a vital step in baking. Creaming involves mixing butter and sugar until the mixture becomes smooth and pale. The key is achieving the right butter consistency—soft but not melted—and using sugar with the right granularity. Fine sugar dissolves more easily, helping you reach that creamy texture faster. This process helps incorporate air into the mixture, creating tiny bubbles that expand during baking. When done properly, creaming creates a light, tender crumb in cakes and cookies. Proper mixing techniques ensure consistent results and enhance texture. Understanding the role of air incorporation during creaming highlights why this step is crucial for achieving the desired lightness in baked goods. Developing a good mixing technique can significantly improve your baking outcomes. Skipping or rushing this step can result in dense, heavy baked goods. So, understanding what creaming is and why it’s important sets the foundation for perfect baking results.

ChefAide 5 Pieces Silicone Spatula Set, Food Grade Rubber Spatula, Upgrade Strong Handle with Ergonomic Grip, Heat Resistant Up to 600°F for Nonstick Cookware, Cooking
Premium 100% Food Grade Silicone: The silicone spatula set is made of healthy and friendly material, resistant to…
As an affiliate, we earn on qualifying purchases.
As an affiliate, we earn on qualifying purchases.
How Does Creaming Incorporate Air to Lighten Baked Goods?

When you cream butter and sugar, you’re trapping tiny air bubbles within the mixture. These bubbles expand during baking, giving your baked goods a lighter texture and increased volume. Understanding this process helps you achieve the perfect lightness in cakes and cookies. Proper mixing technique is essential to incorporate the right amount of air without overworking the batter. Achieving the ideal creaming consistency ensures even distribution of air and optimal rise in your baked treats. Additionally, maintaining the correct temperature of ingredients can influence how well the air is incorporated and maintained during mixing. The role of fat in the creaming process also helps to stabilize the air bubbles, leading to better volume and texture in your baked goods. Mastering the creaming process can also prevent issues like dense or greasy baked goods, making your baked items more enjoyable.
Air Incorporation Process
By beating the butter and sugar together, you introduce tiny air bubbles into the mixture, which is the key to creating a lighter baked good. The type of butter you choose affects how well air is incorporated; softer, room-temperature butter traps air more easily than cold, firm butter. Similarly, the sugar varieties you use—granulated or superfine—play a role. Granulated sugar dissolves more quickly and helps break down fat surfaces, aiding in air entrapment. As you whip the ingredients, the sugar crystals cut into the butter, creating tiny gaps that trap air. This process results in a fluffy, aerated mixture that will expand during baking, giving your baked good its lightness and tender texture. Properly incorporating air is essential for a perfect rise.
Texture and Volume Effects
Creaming butter and sugar creates tiny air pockets that expand during baking, resulting in a lighter, fluffier texture. The process depends on butter softness and sugar granularity; softer butter mixes more easily, trapping air more effectively. The sugar’s size helps cut into the butter, creating a rougher surface for air to cling to. This incorporation of air increases the batter’s volume and affects the final texture. Additionally, proper creaming technique ensures maximum air incorporation for optimal results. Using the right temperature of ingredients can also influence how well the butter and sugar mix and trap air, leading to better aeration. Maintaining consistent ingredient temperature helps achieve uniform mixing and optimal incorporation of air. Paying attention to ingredient quality can further enhance the effectiveness of the creaming process.

WEPSEN Hand Mixer Electric Mixing Bowls Set, 5 Speeds Handheld Mixer with 4 Nesting Stainless Steel Mixing Bowl, Measuring Cups Spoons 200W Kitchen Blender Whisk Beater Baking Supplies For Beginner
Since its launch, it has been recognized by over 100,000 users! It's the best choice for a family…
As an affiliate, we earn on qualifying purchases.
As an affiliate, we earn on qualifying purchases.
Proper Technique for Creaming Butter and Sugar Well

Achieving perfectly creamed butter and sugar requires attention to technique and timing. Start by ensuring your butter is at the right temperature—soft enough to blend smoothly but not melting. Room temperature butter, around 65°F to 70°F, works best. Use the right sugar types; finer sugars like superfine or caster sugar dissolve more easily and create a lighter, fluffier mixture. Begin by beating the butter alone until smooth and creamy, then gradually add the sugar in small portions. Beat on medium speed, scraping down the sides often. The key is to incorporate air without overmixing, so you’ll notice the mixture becomes pale, fluffy, and slightly increased in volume. Proper technique sets the foundation for a successful baked good.

TILUCK Stainless Steel Measuring Cups & Spoons Set, Cups and Spoons,Kitchen Gadgets for Cooking & Baking (10)
[Multiple Sizes]: Including 4 Measuring cups ( 1/4, 1/3, 1/2, 1 cup), 6 Measuring spoons (1/8, 1/4, 1/2…
As an affiliate, we earn on qualifying purchases.
As an affiliate, we earn on qualifying purchases.
How Long Should You Cream Butter and Sugar?
To guarantee your butter and sugar are properly creamed, aim for about 3 to 5 minutes of mixing on medium speed. During this time, you’ll notice the butter’s consistency becomes lighter and fluffier, and the sugar granularity diminishes. The goal is to achieve a smooth, airy mixture that holds some volume. Proper load‑planning can help ensure your mixer runs efficiently and prevents overmixing. Here’s a quick guide:
| Time (minutes) | Butter consistency | Sugar granularity |
|---|---|---|
| 1 | Slightly softened | Coarse |
| 2-3 | Whipped, light | Slightly finer |
| 4-5 | Pale, fluffy | Almost dissolved |
| 6+ | Overmixed, greasy | Too fine |
Keep an eye on texture and avoid rushing, but don’t overmix, which can affect your final baked good.
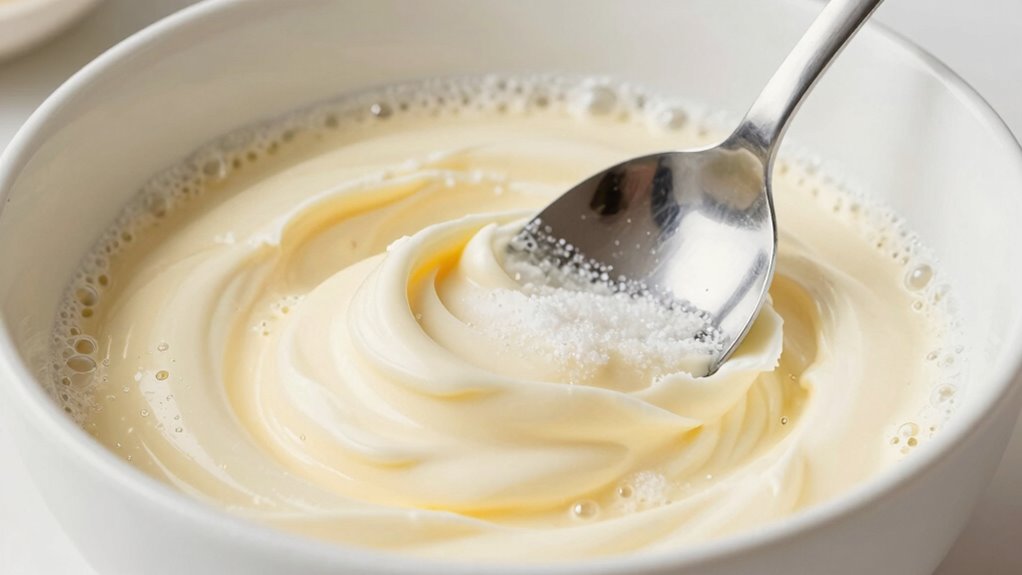
Signs That Your Butter and Sugar Are Properly Creamed

Once you’ve spent the recommended 3 to 5 minutes mixing your butter and sugar, it’s time to look for clear signs that the mixture has reached the right stage. First, check the butter texture—it should be light, fluffy, and pale in color, indicating it’s been properly aerated. Next, observe the sugar granularity; it will be less visible, almost dissolved, giving the mixture a smooth consistency. You might notice a slight increase in volume, and the mixture should hold gentle peaks when you lift your beaters. The overall appearance will be creamy, and the mixture will no longer feel gritty or gritty to the touch. Understanding the science behind creaming can help you achieve more consistent results every time. Proper kitchen automation and precision in mixing can further enhance your baking process, ensuring optimal creaming every time, especially when employing consistent mixing techniques to guarantee uniform results. Additionally, paying attention to temperature control can influence how well your ingredients combine and aerate during creaming.
Common Mistakes to Avoid When Creaming Butter and Sugar
One common mistake is rushing the creaming process or not giving it enough time. This can prevent you from achieving the right texture and affect butter flavors and sugar integration. To avoid errors, keep these tips in mind:
- Use the right sugar types—granulated sugar works best for creaming, while powdered sugar may not incorporate as well.
- Don’t rush; creaming should take about 3-5 minutes until the mixture looks light and fluffy.
- Be mindful of butter temperature—softened butter blends more evenly, ensuring consistent butter flavors and proper sugar incorporation.
- Incorporating knowledge from nanotechnology can inspire innovative tools and techniques for more precise and efficient creaming processes.
- Paying attention to digital displays and real-time data on advanced mixers can help monitor and optimize your creaming technique for the best results.
- Using precision measurement tools can further enhance consistency and help you achieve optimal texture every time.
- Understanding the wave and wind effects on ingredients can help you better control the environment and temperature during creaming for superior results.
Skipping these steps can lead to uneven mixing, affecting the final texture and flavor of your baked goods. Take your time for the best results!
What If You Over- or Under-Creamed? Troubleshooting Tips

If you notice you’ve over- or under-cream, it can affect your baked goods. Over-creaming can make your batter too airy, while under-creaming might result in dense results. Luckily, there are simple ways to fix these issues and keep your baking on track.
Signs of Over-Creaming
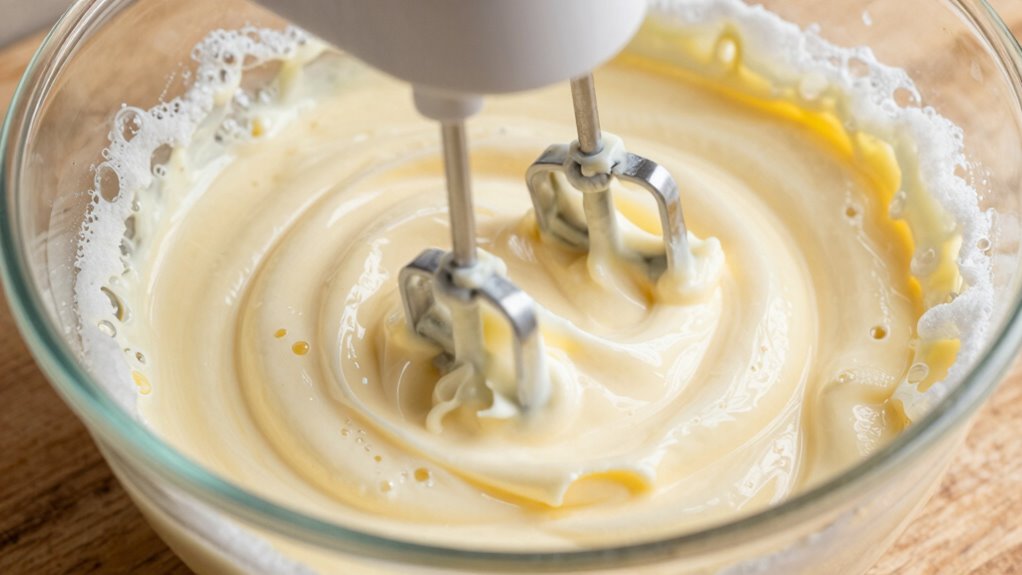
Over-creaming butter and sugar can lead to noticeable changes in your batter’s texture and appearance. You might notice the butter becoming overly fluffy and light, with a pale, almost whipped look. Here are some signs to watch for:
- The butter consistency becomes excessively airy and resembles whipped cream, rather than a smooth, creamy mixture.
- The sugar granularity diminishes, resulting in a less grainy texture that’s overly smooth or even slightly greasy.
- Your batter appears overly thick or greasy, which can affect how it buffs during baking and lead to a dense final product.
If you see these signs, it’s likely you’ve over-creamed, and adjusting your technique or stopping sooner can help prevent issues in your baked goods.
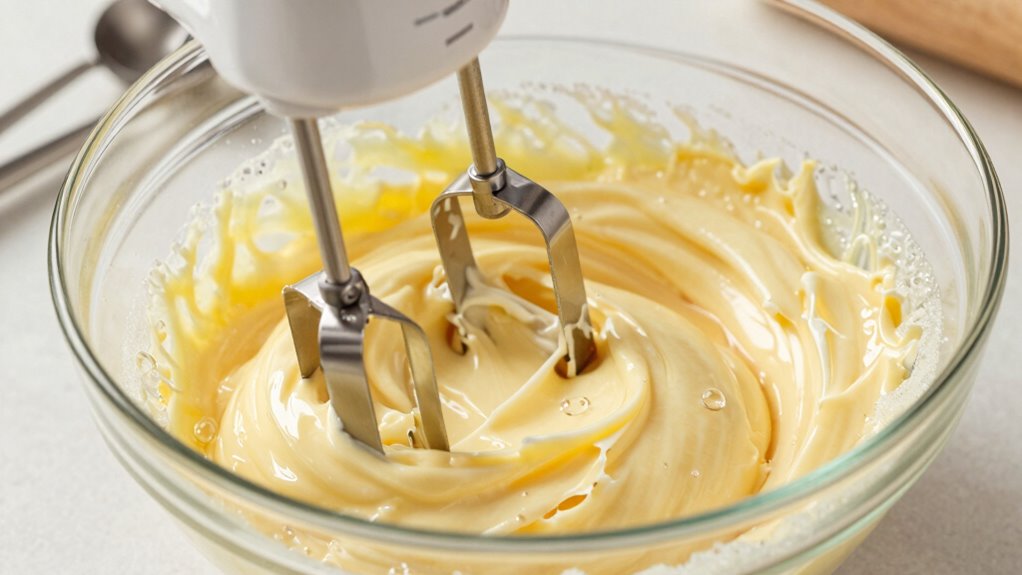
Risks of Under-Creaming
Under-creaming butter and sugar can cause your baked goods to turn out dense, dry, and lacking in proper structure. When you don’t cream enough, the butter remains too firm and doesn’t incorporate enough air, leading to a heavier texture. The butter consistency stays too stiff, preventing the mixture from trapping air effectively. Additionally, if the sugar granularity isn’t fully broken down and evenly distributed, it won’t contribute to the necessary aeration. This results in baked items that don’t rise properly and have a coarse crumb. Under-creaming also means less emulsification, which affects how ingredients blend and impacts the final product’s tenderness. To avoid these risks, verify you cream until the mixture is light, fluffy, and visibly increased in volume.
Fixing Creaming Mistakes
When your creaming process doesn’t go as planned, it can be frustrating to see your baked goods turn out less than ideal. If your butter is too soft or too stiff, or if the sugar granularity isn’t right, here’s how to fix it:
- Adjust butter consistency: If the butter is too soft, chill it slightly before creaming again. If it’s too stiff, let it sit at room temperature for a few minutes.
- Fix sugar granularity: Use superfine sugar for a smoother creaming process or pulse regular sugar briefly in a food processor to improve consistency.
- Stop and reassess: If creaming is uneven, pause, scrape down the sides of the bowl, and mix for a few more seconds to achieve a light, fluffy texture.
How Temperature Affects the Creaming Process

The temperature at which you cream butter and sugar plays a crucial role in achieving the right texture. When butter is too cold, it’s firm, making the process slow and resulting in a dense mixture. Warm butter, on the other hand, creates a softer butter consistency, which can cause over-creaming and a greasy texture. Ideal room temperature butter allows for optimal temperature effects, creating a fluffy, airy mixture. Use the table below to understand how different butter temperatures influence the creaming process:
| Temperature | Butter Consistency | Effects on Creaming |
|---|---|---|
| Cold (<60°F) | Firm | Difficult to incorporate, dense |
| Room Temp (65-70°F) | Soft, spreadable | Perfect for creaming, light texture |
| Warm (>75°F) | Very soft, greasy | Over-creaming risk, flat batter |
Tips for Perfectly Creamed Butter and Sugar Every Time
Achieving perfectly creamed butter and sugar every time starts with using the right techniques and attention to detail. First, verify your butter is at the right consistency—soft but not melting—so it blends smoothly with the sugar. Second, choose sugar with fine granularity; superfine or castor sugar dissolves more evenly, creating a lighter texture. Third, beat the mixture on medium speed, scraping down the sides regularly, until it’s pale, fluffy, and has increased in volume. This process helps incorporate air and develop the ideal creaming texture. Remember, patience is key—rushing can compromise the butter consistency and prevent proper sugar integration. Follow these tips, and you’ll achieve perfectly creamed butter and sugar every time, setting a solid foundation for your baked goods.
Frequently Asked Questions
Can I Cream Butter and Sugar in the Microwave?
You shouldn’t try to cream butter and sugar in the microwave because microwave melting can cause uneven heating, leading to sugar crystallization and a lumpy mixture. Instead, soften the butter at room temperature for better control and consistent creaming. Microwaving may seem quick, but it risks ruining the texture needed for proper baking. Stick with gentle, room-temperature creaming to achieve the smooth, airy mixture your recipe needs.
Does the Type of Sugar Affect Creaming?
Yes, the type of sugar affects creaming because sugar granularity impacts how well it incorporates with butter. Fine, processed sugar like superfine or caster dissolves more easily, creating a light, fluffy mixture. Natural sugars, like raw or unrefined, are coarser and may not cream as smoothly. Using the right sugar type guarantees you get the desired texture and aeration in your baked goods.
Can I Cream Butter and Sugar Using a Hand Mixer?
Yes, you can cream butter and sugar using a hand mixer. Just guarantee you use the creaming technique properly: start on low speed to combine, then gradually increase to medium or high. Keep mixing until the mixture becomes light, fluffy, and pale in color. A hand mixer makes the process easier and quicker, but watch carefully to avoid overmixing. With patience, you’ll achieve a perfect creamed mixture every time.
How Do I Fix Poorly Creamed Butter and Sugar?
Fixing poorly creamed butter and sugar is simpler than you think. First, assess the signs of a poorly creamed mixture—it’s often grainy and lacks fluffiness. To improve, add a tiny splash of milk or cream, then gently beat again, using proper techniques for creaming like starting slow and increasing speed gradually. With patience, your mixture will turn silky smooth, transforming your baking into a masterpiece worthy of applause.
Is Room Temperature Butter Necessary for Creaming?
Yes, room temperature butter is essential for achieving the right creaming consistency. When your butter is at the right temperature, it softens enough to incorporate air easily, resulting in a smooth, fluffy mixture. If your butter is too cold or too warm, creaming becomes difficult, and the mixture won’t hold the proper texture. You’ll get better results by ensuring your butter is softened but not melted before you start creaming.
Conclusion
Mastering the creaming process bridges science and art; it’s both precise and forgiving. When done right, your baked goods rise beautifully, light and tender. Yet, rushing or rushing to perfect it can undermine your efforts, turning airy perfection into dense disappointment. Embrace patience and attention to detail, for in creaming, as in baking, the difference between good and great often lies in the subtle balance—delicate as a whisper, powerful as a souffle.