
Using a pressure cooker for steel cut oats with the no-stir method is quick, clean, and results in creamy, perfectly cooked oats without mess. Simply use the right oats-to-liquid ratio, set your cooker to pressure, and let it naturally release to prevent overcooking or splattering. With safety features and simple steps, you can get consistent results every time. If you want to master this easy technique and customize your oats, keep going for all the tips and tricks.
Key Takeaways
- Use a pressure cooker with safety features to cook steel cut oats safely and prevent spills.
- Maintain a 3:1 liquid-to-oats ratio and cook at recommended pressure levels for creamy results.
- Opt for natural pressure release to avoid mushiness and splattering, ensuring perfect texture.
- Add flavorings like cinnamon or vanilla before cooking for enhanced taste without stirring.
- Gently stir the oats after cooking to achieve uniform creaminess and customize with toppings.
Why Use a Pressure Cooker for Steel Cut Oats? Benefits & Advantages
Using a pressure cooker to prepare steel cut oats offers several clear benefits. It markedly improves cooking safety by reducing the risk of boil-overs and splatters, making cleanup easier and safer. Plus, the sealed environment traps heat and moisture, ensuring consistent results every time. The high-pressure environment speeds up cooking, so you get tender oats in a fraction of the usual time. Additionally, cooking under pressure enhances flavor, as the oats absorb more of the cooking liquid’s richness, resulting in a more flavorful bowl. This method minimizes the need for stirring, which can sometimes break down the oats or cause uneven cooking. Furthermore, the pressure retention feature of a pressure cooker ensures even heat distribution for optimal texture. Incorporating a ventilation considerations approach can help manage moisture and prevent condensation buildup. Proper steam release techniques are also essential to ensure safety and preserve the quality of the cooked oats. Using a pressure cooker with safety features can provide extra peace of mind during cooking. Overall, a pressure cooker streamlines the process, boosts safety, and elevates flavor, making it an excellent tool for preparing steel cut oats efficiently. Additionally, understanding the homemade oatmeal process can help you customize textures and flavors to suit your preferences.
Ingredients and Equipment Needed for No-Stir Steel Cut Oats

To make no-stir steel cut oats in a pressure cooker, you’ll need some simple ingredients like oats, water or milk, and a pinch of salt. Luckily, these items are easy to find at any grocery store. Just as important, having a reliable pressure cooker guarantees your oats cook perfectly without any fuss. Additionally, using a sustainable cloud infrastructure can enhance your cooking experience by ensuring energy-efficient appliances and eco-friendly practices in your kitchen. Incorporating proper cooking techniques can also help achieve consistent results and prevent common issues like burning or undercooking. Being aware of energy-efficient appliances can further optimize your kitchen setup and reduce your environmental impact. When selecting your equipment, consider models that are designed for energy efficiency to maximize sustainability and cost savings. Utilizing smart kitchen technology can further streamline your cooking process and improve overall efficiency.
Easy-to-Find Ingredients
For a simple and straightforward no-stir steel cut oats recipe, you’ll need just a few basic ingredients and equipment. The main ingredient, steel cut oats, is easy to find at most grocery stores, but quick substitutions like rolled oats can work in a pinch—though cooking times may vary. You’ll also need water or milk, which are pantry staples, to create a creamy texture. A pinch of salt enhances the flavor. The equipment required is minimal: a pressure cooker and a measuring cup. This approach relies on common ingredients you likely already have, making it easy to whip up a nutritious breakfast without special shopping trips. With these simple, accessible ingredients, you’re all set to make hearty steel cut oats effortlessly.
Reliable Cooking Equipment
A reliable pressure cooker is all you need to make no-stir steel cut oats effortlessly. Investing in a sturdy, well-made model ensures both cooking safety and equipment durability. Look for features like secure locking lids, pressure release valves, and sturdy construction. These components help prevent accidents and promote consistent results. Here’s a quick overview:
| Feature | Importance | Recommendation |
|---|---|---|
| Safety Lock | Prevents accidental opening | Choose models with strong locks |
| Pressure Release | Controls cooking pressure | Prefer models with adjustable valves |
| Material | Durability and safety | Opt for stainless steel |
| Construction | Long-term use | Solid, corrosion-resistant |
| Ease of Use | Simplifies cooking process | User-friendly controls |
A dependable pressure cooker guarantees safe, durable, no-stir oats every time. Proper pressure regulation is crucial for achieving perfectly cooked oats without burning or overcooking, and understanding pressure settings helps optimize cooking results. Additionally, selecting a model with user-friendly controls can make the cooking process more straightforward for beginners.
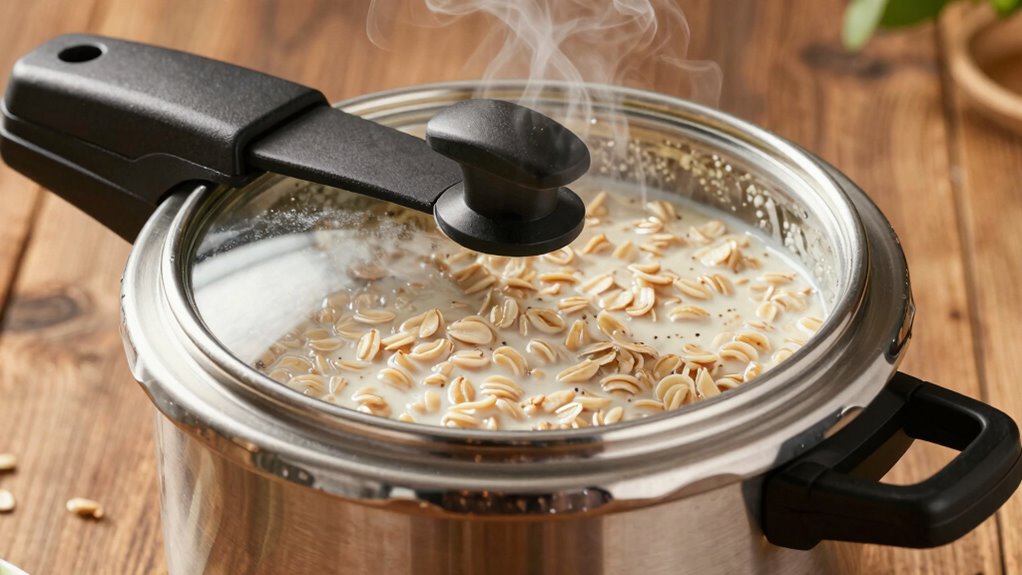
How to Cook Steel Cut Oats in a Pressure Cooker Without Stirring

Cooking steel cut oats in a pressure cooker without stirring is simple and guarantees a creamy, even texture. To achieve this, follow your pressure cooker’s recommended cooking time and pressure level. Use a natural pressure release to prevent stirring or disturbing the oats. Consider these cooking techniques for ideal results:
- Use a consistent ratio of oats to liquid for uniform texture
- Add flavorings before cooking, like cinnamon or vanilla, for better flavor pairings
- Avoid opening the lid prematurely to prevent disrupting the oats’ surface
- Use a heat diffuser if your stove runs hot to maintain steady pressure
- Let the oats rest briefly after cooking for a smoother finish
- Ensuring proper pressure regulation helps maintain consistent cooking conditions without stirring. Additionally, selecting the right pressure cooker type can influence the ease and success of this no-stir method. Proper pressure control is essential for achieving optimal results every time. This method simplifies preparation while ensuring your oats develop rich flavors and a perfect consistency.
Tips for Perfectly Creamy Steel Cut Oats Every Time

To get perfectly creamy steel cut oats, start with the right water ratio—usually more water than oats for a smooth texture. After cooking, let the pressure release naturally to prevent the oats from becoming too thick or gritty. Before serving, gently stir the oats to incorporate any settled bits and create a consistently creamy consistency. Additionally, using the correct water-to-oats ratio is essential for achieving the ideal texture every time. Ensuring the right pressure cooker settings can also help produce consistently creamy oats without overcooking.
Use Correct Water Ratio
Achieving the perfect creamy texture in steel cut oats depends largely on getting the right water-to-oat ratio. This ratio influences both the consistency and cooking times, ensuring your oats aren’t too thick or too runny. For ideal results, use approximately 3 parts water to 1 part oats. Keep in mind, adjustments might be necessary based on your preferred creaminess or pressure cooker model. To refine your process:
- Maintain consistent water ratios for repeatable results
- Adjust water slightly for softer or firmer oats
- Use a reliable measuring cup for accuracy
- Account for pressure cooker-specific cooking times
- Remember that too much water can lead to mush, while too little may cause undercooking
Finding the right balance guarantees perfectly creamy oats every time.
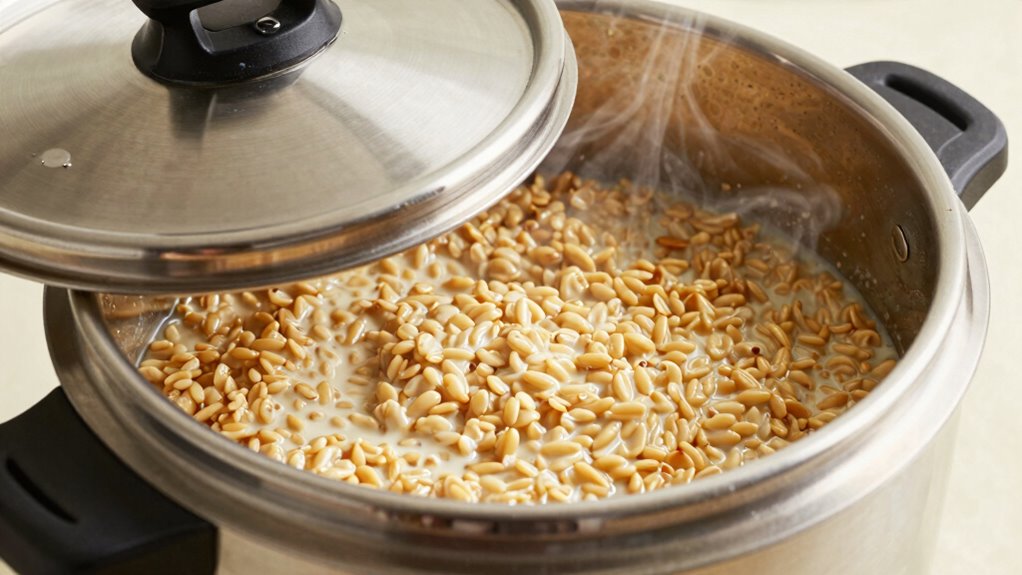
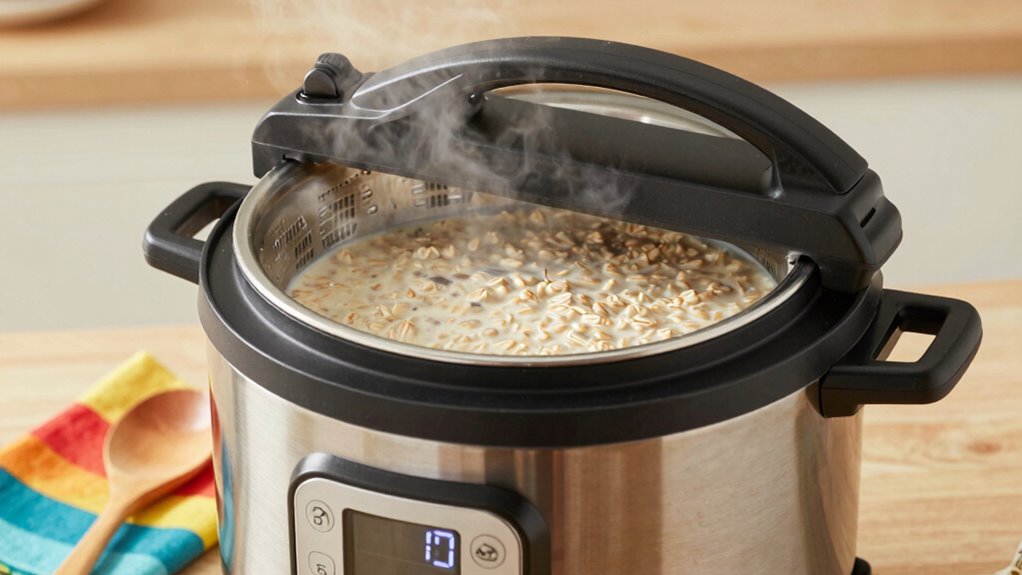
Opt for Natural Release
Once you’ve set the perfect water-to-oat ratio and started cooking under pressure, how you release that pressure can make all the difference in your oats’ final texture. Opting for a natural release allows the residual steam to gently finish cooking your oats, resulting in creamier, more tender results. This method takes about 10-15 minutes and helps prevent the oats from becoming mushy. If you’re short on time, a quick release can be tempting, but it may cause the oats to splash or turn out less creamy. For consistently perfect oats, stick with natural release whenever possible. It guarantees the pressure subsides gradually, giving your oats a smooth, velvety consistency every time. Additionally, understanding the support breakfast options can enhance your overall breakfast experience, whether you’re preparing a quick steel-cut oats dish or a more elaborate morning meal. Recognizing the craftsmanship involved in high-quality oats can also inspire more appreciation for your simple yet nutritious breakfast. Being aware of pressure release methods can help you achieve the ideal texture and avoid common cooking mishaps, especially considering the security zone info that emphasizes safety in kitchen appliances.
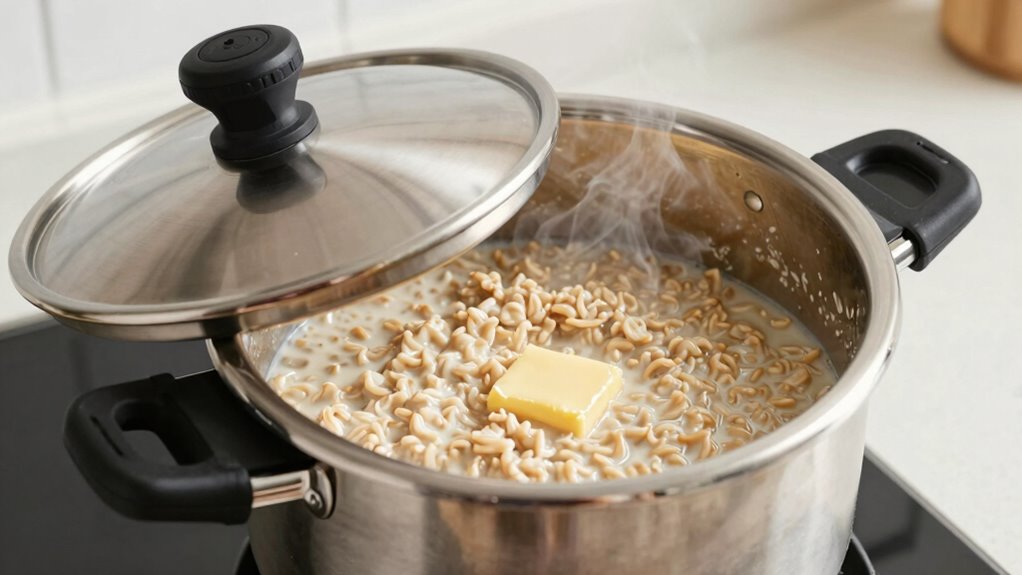
Stir Gently Before Serving
After the oats finish cooking and the pressure has been released, gently stirring them helps distribute the creamy texture evenly. This step assures a consistent mixing consistency, preventing the oats from settling unevenly. Use a gentle, folding motion to avoid breaking the grains, which preserves the oats’ smoothness. A light stir also enhances the serving presentation, making the dish more appealing. For a polished look, consider the following tips:
- Use a silicone spatula for gentle mixing
- Avoid over-stirring to maintain creaminess
- Check for desired thickness before serving
- Incorporate toppings after stirring for visual appeal
- Serve immediately for the best texture
This careful approach guarantees perfectly creamy oats with an attractive presentation every time.
Flavor Variations to Customize Your No-Stir Steel Cut Oats
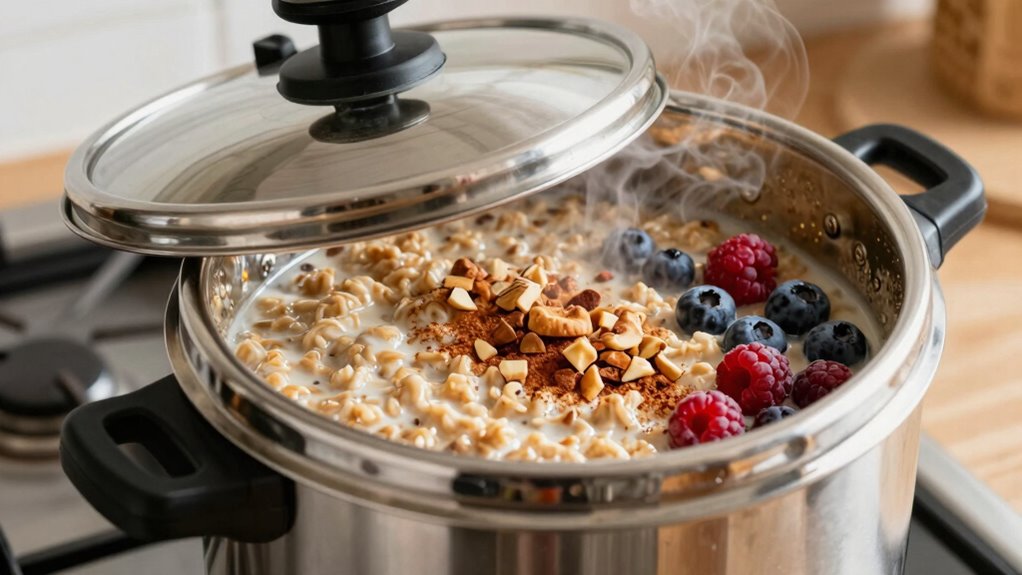
You can easily customize your no-stir steel cut oats by adding a variety of flavorings during the cooking process. For a sweet touch, toss in cinnamon, vanilla extract, or a handful of dried fruits like cranberries or raisins. These create a naturally sweet and comforting flavor. If you prefer savory oats, add ingredients like garlic powder, nutritional yeast, or chopped herbs such as thyme or parsley to give your oats a savory boost. You can also stir in cheese or cooked vegetables after cooking for added richness. Combining sweet toppings with savory add-ins offers endless possibilities for personalized flavor profiles. This flexibility allows you to enjoy a different taste each morning, all while sticking to the no-stir method and making your breakfast convenient and delicious.
Troubleshooting Common Problems With Pressure Cooker Steel Cut Oats
Even with the best intentions, problems can arise when cooking steel cut oats in a pressure cooker. Overcooking issues often lead to a mushy texture, while undercooking results in chewy oats. To troubleshoot:
Cooking steel cut oats in a pressure cooker can lead to mushy or chewy textures—adjust timing and liquid for perfect results.
- Adjust cooking time for your desired consistency.
- Use a natural pressure release to prevent uneven texture.
- Confirm proper liquid ratios to avoid dry or watery oats.
- Check your pressure settings for consistency.
- Consider rinsing oats beforehand to reduce excess starch that causes stickiness.
Storing and Reheating Leftover Steel Cut Oats Safely
Storing and reheating leftover steel cut oats securely guarantees you enjoy their nutritious benefits without risking foodborne illnesses. For effective meal prep, transfer the cooled oats into airtight storage solutions, like containers with tight-fitting lids or resealable bags. Keep leftovers in the refrigerator within two hours of cooking to prevent bacteria growth. When reheating, add a splash of water or milk to restore the oats’ creamy texture, and warm them thoroughly to at least 165°F (74°C). You can reheat on the stovetop or in the microwave, stirring occasionally for even heating. Avoid leaving leftovers at room temperature for too long, and consume refrigerated oats within 3-4 days. Proper storage solutions and reheating practices keep your steel cut oats safe and delicious for future meals.
Frequently Asked Questions
Can I Cook Steel Cut Oats in a Pressure Cooker Without Soaking Beforehand?
Yes, you can cook steel cut oats in a pressure cooker without soaking beforehand. Soaking requirements are minimal for this method, making pre cooking preparation quick and easy. Just rinse the oats, add them with water or milk, and cook under pressure for about 4-5 minutes. This no-soak approach saves time and delivers creamy, perfectly cooked oats without the need for overnight prep.
How Long Does It Take to Cook Steel Cut Oats in a Pressure Cooker?
Ever wondered how long it takes to cook steel cut oats in a pressure cooker? Typically, it takes about 4-5 minutes at high pressure, depending on your cooker’s settings. You’ll want to set it to high pressure and cook for this duration, then let the pressure release naturally. Are you ready to enjoy perfectly tender oats in just minutes? This quick method saves time and effort while delivering delicious results.
Is It Safe to Open the Pressure Cooker Immediately After Cooking?
No, it’s not safe to open the pressure cooker immediately after cooking. You should wait for a proper pressure release, either natural or quick, to reduce safety concerns. Opening too soon can cause hot steam or liquid to escape suddenly, risking burns or injuries. Always follow your pressure cooker’s instructions for safe pressure release times before opening, ensuring your safety and preventing accidents.
Can I Add Other Grains or Ingredients During the No-Stir Cooking Process?
Yes, you can add other grains or ingredients during the no-stir cooking process. To enhance flavor, consider adding spices like cinnamon or nutmeg, and incorporate nuts for added texture. Just be mindful of the cooking times for different ingredients to avoid overcooking. Add delicate items toward the end if needed, and keep the lid sealed to maintain pressure and make sure everything cooks evenly without stirring.
How Do I Prevent the Oats From Sticking to the Bottom of the Cooker?
To prevent oats from sticking, first apply a light coat of cooking spray to the pressure cooker’s bottom, or use a non-stick coating if available. Make certain you add enough liquid to keep everything submerged, as this also helps prevent sticking. Using the no-stir method, avoid lifting the lid too often. These steps help keep your oats from sticking and make cleanup easier.
Conclusion
Once you master the no-stir pressure cooker method, making perfect steel cut oats becomes effortless—like turning on a tap and watching creamy goodness flow. I once underestimated this simple technique, only to find breakfast smoother and tastier than ever. Just like a trusted recipe, it’s reliable and stress-free. With a little practice, you’ll turn mornings into a breeze, savoring warm, comforting oats without the fuss—proving that sometimes, the simplest method truly is the best.