To make nut butter without burning your blender’s motor, start with a high-powered blender (500-1000W) and prepare your nuts by lightly roasting and cooling them. Begin blending on a low or pulse setting, gradually increasing speed while pausing to prevent overheating. Add small amounts of oil to ease blending and avoid overloading the machine. If you keep these tips in mind, you’ll produce smooth nut butter and protect your blender’s motor—discover more techniques below.
Key Takeaways
- Use a high-powered blender (500-1000W) with multiple speed settings and pulse functions.
- Start blending at low speed, gradually increase, and pause frequently to cool the motor.
- Add small amounts of oil or liquids to reduce strain and prevent overheating.
- Blend in short intervals, avoiding continuous operation, and use the tamper to push nuts toward blades.
- Regularly check for overheating, listen for unusual noises, and clean the blender after use to maintain motor health.
How to Choose the Best Blender for Making Nut Butter
Choosing the right blender is essential for making smooth, creamy nut butter. Look for a high-powered blender with a sturdy motor, ideally between 500-1000 watts, to handle nuts without overheating. A durable container with a wide, stable base ensures efficient blending and easy cleanup. Consider blenders with multiple speed settings and pulse functions, giving you control over texture. Good nut storage is important, so choose a blender that preserves freshness and flavor enhancement by preventing heat buildup during blending. Also, a model with a tamper tool helps push nuts toward the blades, reducing strain on the motor. Investing in the right blender makes your process smoother, preserves nut flavor, and results in perfect homemade nut butter.
Preparing Nuts for Smooth Homemade Nut Butter

Before blending, it’s important to prepare your nuts properly to guarantee a smooth, creamy result. Start by lightly roasting your nuts to enhance flavor and improve texture, making blending easier. Roasting also releases richer nutty flavors, giving your butter a more vibrant taste. Once roasted, let the nuts cool completely before processing. If desired, remove the skins to create an even smoother butter. Proper preparation assures your blender doesn’t strain or burn out. Use the following ideas as a quick guide:
| Step | Purpose |
|---|---|
| Nut Roasting | Flavor enhancement, easier blending |
| Cooling | Prevents motor strain, smooth blending |
| Removing skins | Smoother texture |
| Proper storage | Maintains freshness |
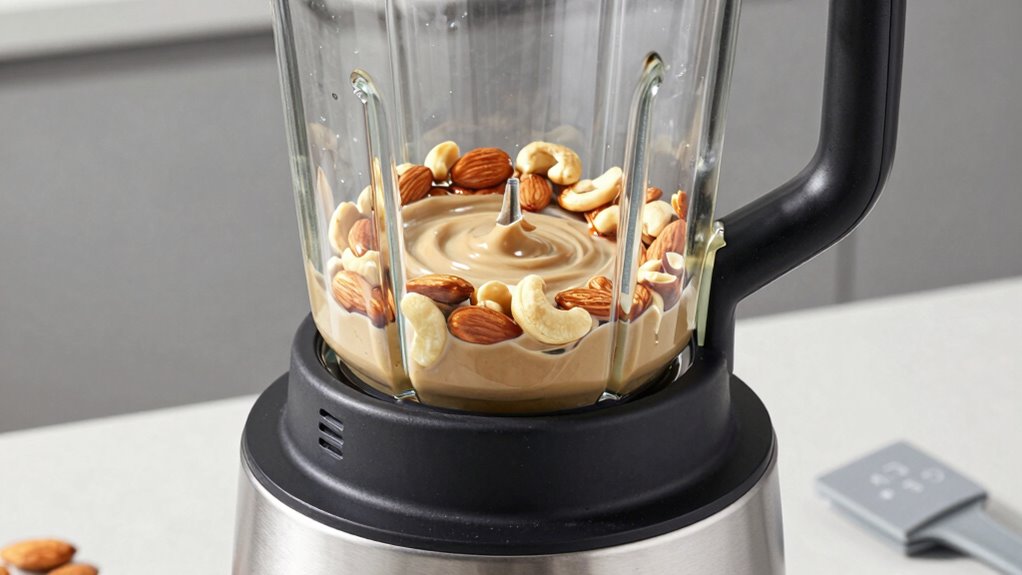
How to Blend Nuts Without Burning Out Your Blender

To prevent your blender from overheating and burning out, it’s essential to blend the nuts gradually and use the right techniques. Start with lightly roasted nuts, which release natural oils that help create smooth nut butter without overworking your motor. During blending, pause regularly to give the motor a break and prevent overheating. If the mixture feels too thick or starts to stall, adding a small amount of oil can help it process more easily, reducing strain on the blender. Avoid blending at high speeds initially; instead, start slow and gradually increase speed as the nuts break down. These steps help manage heat, prevent burnout, and ensure a creamy, well-blended nut butter without compromising your blender’s motor. Proper blending techniques are also essential to maintain your blender’s longevity and performance. Additionally, choosing a blender with a powerful motor can make the process smoother and reduce the risk of overheating. Incorporating body-safe materials in your blender’s design can also contribute to its durability during intensive blending tasks. Moreover, using cooling pauses during blending can help dissipate heat build-up, protecting your appliance. Implementing heat-resistant components can further enhance your blender’s ability to handle repetitive blending without damage.
Tips for Using Add-ins and Managing Temperature Safely

Adding mix-ins like chocolate chips, dried fruit, or seeds can enhance your nut butter, but it’s important to do so carefully to prevent overheating. To add flavor without risking damage, wait until the nuts are mostly blended and the mixture is cool enough before folding in extras. This helps manage temperature and avoids straining your blender’s motor. When incorporating add-ins, do so gradually, and pulse instead of continuous blending. If you have leftovers, store them in an airtight container in the fridge to keep freshness and prevent spoilage. Managing temperature carefully during blending and handling leftovers properly ensures your nut butter stays delicious and your blender remains in good condition. Always pay attention to heat buildup and avoid overworking your appliance. Proper maintenance can help extend your blender’s lifespan and keep it functioning smoothly.
Troubleshooting Common Blending Issues and Extending Your Blender’s Lifespan

Even with careful temperature management, you may encounter blending issues or notice your blender struggling over time. Excessive blender noise can signal strain or worn components, so listen carefully. If the motor begins to overheat, it’s a sign you’re pushing it too hard or blending for too long. To prevent damage, pause frequently and let the motor cool down. Avoid overfilling the jar, which can cause uneven blending and strain the motor. Using pulse settings can help manage consistency without overloading. Regularly check for burnt smells or unusual sounds, which indicate trouble. Proper maintenance, like cleaning and avoiding excessive use, extends your blender’s lifespan. Smart maintenance, such as timely cleaning and careful operation, can prevent issues before they arise. Address issues early to keep your appliance running smoothly and avoid costly repairs. Additionally, understanding blender capacity can help you optimize your batches and prevent overloading, further protecting your motor. Being aware of motor strain indicators allows you to take proactive steps to safeguard your appliance’s longevity. Incorporating preventive care strategies can also improve overall performance and durability. For example, choosing the right speed settings for different ingredients can help minimize motor stress and extend your blender’s life.
Frequently Asked Questions
Can I Make Nut Butters With a Regular Household Blender?
Yes, you can make nut butter with a regular household blender. Just be mindful of blender maintenance by pulsing and giving it breaks to prevent overheating. Use small batches and add a little oil if needed for smoother consistency. Follow nut butter recipes that start with roasted nuts, and avoid overloading the blender. With patience and proper care, your blender can handle making delicious homemade nut butters efficiently.
How Long Does It Typically Take to Make Nut Butter?
They say patience is a virtue, and making nut butter proves it. Typically, your blending time depends on the desired nut butter texture—rough or creamy—and your blender’s power. Usually, it takes about 5 to 15 minutes, with occasional pauses to prevent overheating. Start with short bursts, and blend until the mixture reaches your preferred consistency. Remember, the key is consistent effort without rushing, to get that perfect nut butter.
Is It Necessary to Add Oil or Sweeteners?
You don’t need to add oil or sweeteners to make nut butter, but they can improve texture and flavor. For natural sweetness, you might consider adding a little honey or maple syrup. If you want to avoid oil, try using oil alternatives like coconut oil or a splash of water to help blend. Adjust gradually to get the consistency you prefer, and taste as you go to customize your nut butter.
What Are the Best Nuts for Creamy Nut Butter?
You should choose nut varieties like cashews, almonds, or hazelnuts for creamy nut butter. Roasting techniques, such as dry roasting or adding a little oil during roasting, enhance flavor and creaminess. Roasting also helps release oils, making blending easier. Opt for fresh, high-quality nuts and roast them until fragrant, then let them cool before blending. These steps make certain your nut butter turns out smooth and delicious.
How Do I Store Homemade Nut Butter Properly?
Think of your homemade nut butter as a treasure worth protecting. Store it in an airtight container to keep moisture out and preserve its freshness. Keep it in the fridge to extend its shelf life, preventing it from turning rancid. Always use a clean spoon to avoid contamination. With proper nut storage, your delicious creation stays creamy and delicious for up to two weeks, ready to satisfy your cravings anytime.
Conclusion
So, armed with the perfect blender and a few savvy tips, you’d think making nut butter is a breeze—until you realize it’s actually a delicate dance of patience and temperature control. Ironically, the very machine you rely on to blend might be the one to burn out if you don’t respect its limits. But hey, with a little care, you’ll enjoy creamy homemade nut butter without turning your kitchen into a smoky disaster zone.